At Home Pedicures

As wonderful as professional salon services are, it’s hard to justify the cost. It’s even harder to justify the risk of affecting your family’s health. Therefore, my Mom and I have starting taking self-care into our own hands during this new normal, including at home pedicures!

Now, my mom is the guru when it comes to salon style beauty, so I grabbed some tips from her. We also took some hints from her magazine collection (which also came in handy as our relaxation reading material). So if you want a fun girl’s afternoon, but are really into saving some money and keeping your family safe, try these out for size!

Materials

  1. One basin per person, large enough for both feet
  2. Nail polish remover
  3. Cotton pads or Q-tips
  4. Pumice stone
  5. Foot file
  6. Nail trimmer (scissors or clippers)
  7. Nail file or buffer
  8. Cuticle pusher or orange stick
  9. Cuticle cutters
  10. Moisturizer
  11. Toe Separators
  12. Base polish
  13. Nail polish
  14. Top coat
  15. Magazines/Romance Comedy Movie/Spa Music

Before getting off on the wrong foot, I know this list looks a little exhaustive – but have no fear! You can improvise or skip steps and you will still have a good time and good-looking toes! Now that we know that, let’s just jump right in!

Step 1. Prep your tools and work station. We put on a romantic comedy movie and busted out some chips and dip. If I were to do a pedicure alone, I likely would have put on spa music but to each there own! Also fill your basins with hot water. Add any desired perfumes or salts for added pampering.

Step 2. Remove old nail polish with your nail polish remover and cotton pads. Put the pad over the bottle top and invert it for a brief second to allow the pad to soak up some of the liquid. Then use the wet cotton pad to clean your nails. It’s definitely easier to remove the polish if you let the pad sit on your nail for roughly 10 seconds, letting the nail polish absorb the acetone. Then wipe all the access away. If you aren’t wearing any nail polish, it’s still a good idea to clean your nails this way as it removes dirt and grease too!

Step 3. Next, soak your feet in the basin. Every ten minutes or so, you can pull them out to scrub the dry spots with a pumice stone or other callous remover tool. Never use anything sharp or attempt to cut off dry spots as this can be potentially dangerous. Soaking your feet before scrubbing the areas will drastically help remove any dead skin, and will eventually make your feet baby smooth again, even if it takes multiple tries. Just keep soaking and scrubbing! If you find the pumice stone or other scrubbing tool is not working for you, I actually preferred using my own nails. Worked just as well!

Step 4. After soaking and scrubbing, if your skin still needs a little extra love, dry them and use a foot file. This works best if your feet are dry as the skin comes off in a powder-like form, making your skin softer.

Step 5. Clip your nails with a pair of nail scissors or clippers. Personally, I prefer ordinary finger nail clippers. I find toe nail clippers or scissors too hard to maneuver and regular nail clippers allow me to get a straight cut across the nail. I also prefer to keep my nails short to prevent them from getting caught on anything. I also wear an odd variety of shoes and having short nails allows my feet to be comfortable in any toe shape. When cutting your nails, be sure not to too far back on the corners as this can lead to ingrown toenails – super painful!

Step 6. File the new cuts with a nail file. I used a nail buffer to do this, brushing the nail in a downward motion rather than from side to side. This made the cuts very soft to the touch and not at all sharp. I also buffed the rest of the nail a smidge, which I was told would help the nail polish stick on better!

Step 7. Use a cuticle pusher to gently push your cuticles and expose the new nail growth. This was always my least favourite part of getting a professional pedicure because it was always kind of painful! Now that I’m in the driver seat, I can gently perform this task, making it a lot more pleasant and just as nice looking! Afterwards, you may notice the extra skin built up around your nails and may want to remove it. If it makes you more comfortable, you can use a pair of cuticle cutters to remove it but go slow to avoid any tears to your skin. Feel free to buff again with your nail buffer!

Step 8. After all the scrubbing, cutting, filing, and buffing, your feet may look a little caked in powder. Go ahead and remove as much excess as possible with a cloth or paper towel. You can then use your moisturizer to soften and pamper your feet! If you’re avid reader of my blogs, I’m sure it will come as no surprise to you that I used coconut oil. As well as the many health properties coconuts have, they are also known to be a great anti-aging moisturizer as well as being better for the planet than traditional lotions.

Step 9. At this stage, your feet may look and feel amazing and you may feel good enough to just walk away. I almost did until my Mom pulled out a shiny, clear nail gloss. So we busted out the toe separators! Before putting these bad boys on, I was told to give my toes and feet a little stretch to help with the awkward feeling of the separators.

Step 10. Once separated, run another acetone soaked cotton ball over the nails again to remove the oil from the previous steps. If putting on coloured nail polish, I was advised that a base coat would keep the polish from chipping. We also read that a quick buff from a nail buffer would do the trick so it’s personal preference (or availability)!

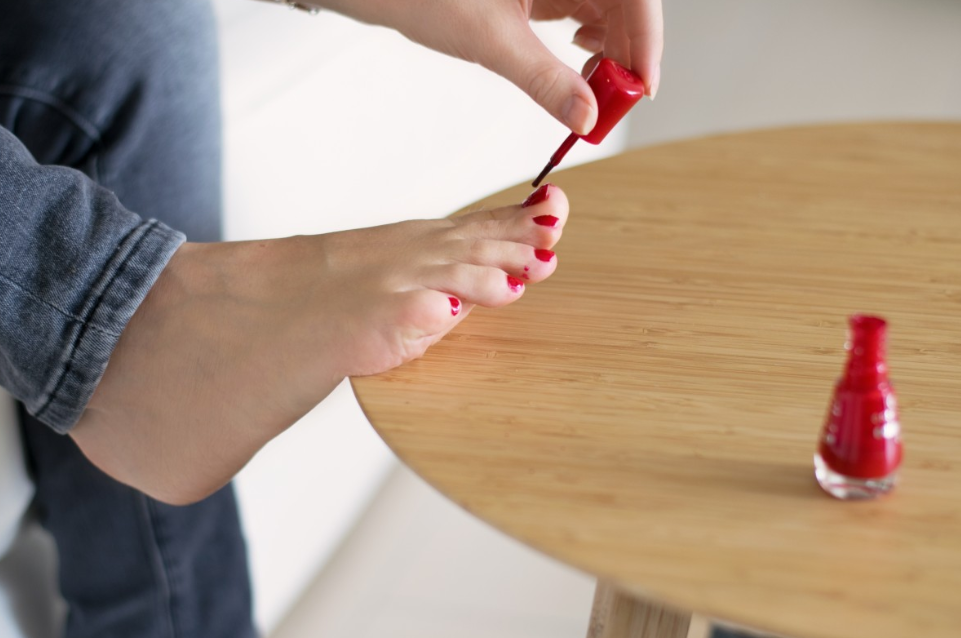
Step 11. Next apply your polish! I went with a clear shine but I find any lighter colours look great in summer, especially with your summertime tan! Use your brush and always go from the left-most toe to the right-most toe if right-handed and vice versa if left-handed. This prevents unconsciously smearing the previously painted toe! Also, if you have small nails and often flood the base with polish, an orange stick or Q-tip can help clean it up. If you don’t have either, you can always use your fingernail or paper towel. Paint your toes with two coats, letting dry between coats, to get an even colour and prevent chips.

Step 12. Before adding your top coat, clean up the skin with an acetone soaked Q-tip or paper towel. You’re then free to add that top coat and finish your rom-com as you let them dry!

Last Foot

I hope you were able to get your foot in the door with these pedicure tips! If you have a cool self-pampering tip, sweep me off my feet with it! Until next time, stay safe and sane!

Toy and Clothing Reviews

Photo courtesy of amazon.com

Toy sales have taken a strange turn during this new normal. I’ve certainly noticed the new pricing system for many of my favourite goods, including foods, clothing, and activity toys. Lots of things are on for better deals now, although my family has had to make some adjustments in how we shop, allowing us to be a little more thrifty. Here’s what we’ve noticed (or read):

  1. Activity toys and puzzle sales have skyrocketed since the closing of schools, and has really made my family happy to have more options and products available. We’ve been preparing for Kindergarten and it’s lovely to see more books, puzzle, and educational toys offered online.
  2. Used clothing and toy stores have closed, including my favourite Once Upon a Child. This has so far been the only negative we’ve noticed as it has made it a touch more difficult in getting quality items for low prices.
  3. Many clothing and toy stores are promoting large sales and more delivery options. We’ve been fortunate to find great deals on clothing (which is helpful as we are no longer able to purchase used) and complete curbside pickup at certain locations.
  4. The closing of many stores has caused a sharp decline in impulse buying, particularly for my family. We no longer see something we didn’t need and purchase small, inexpensive toys or clothing that really add up after a while.
  5. The new normal of purchasing and selection has really enabled me to complete adequate research on items and think about budget before spending. This is a huge benefit to us!

All of these observations have allowed us to save money and (in an obscure way) spend more time with our boys! Let me now share with you some of the great finds we’ve come across!

Photo courtesy of pinterest.com

Kinetic Sand

Kinetic sand is an amazing alternative to Play-doh or slime. We’ve been a Play-doh family since the beginning and more recently were introduced to slime. Both of these are great messy toys but they sure do make a mess! Personally, I don’t mind the mess, but I don’t particularly like how short lasting these two options are by drying out so quick. Enter Kinetic sand! A soft, malleable sand that sticks together and doesn’t dry out! It’s also easier to clean off of clothes and the floor by being so sticky to itself. My boys use it primarily in their “baking” game where they make me delicious sand cookies. Coming in many cool colours and providing endless hours of fun, this was a winner in this home! You can find it on most online shopping browsers, but if you order from Mastermind Toys, the order came very quickly for us and they do curbside pickup! Find it here.

Photo courtesy of pinterest.com

Globber 3 in 1 Scooter

The Globber 3 in 1 scooter is a super cool activity toy that has given my youngster a running start at keeping up with his big bro. It reminds me of a convertible carseat with its ability to turn from a ride-on toy to a scooter in two easy steps. My Polar Bear can sit on his seat while I maneuver to keep up with Grizzly Bear on his bike, or he can putter around on his own, practicing his footwork. A little extravagant but a great one for any little one! Find it here.

Photo courtesy of amazon.com

My First Dot-to-Dot Book and Paint by Stickers

Grizzly Bear is incredible at reading at writing, even for his young age, and Polar Bear is quickly mastering his numbers. They have always loved books and learning new things but there weren’t many books that they found just as enjoyable as educational. In preparing Grizzly Bear for Kindergarten and Polar Bear for Preschool, I’ve done my research and found a few greats in the many that are out there – and these are the two that really stuck out for all of us! My First Dot-to-Dot is an excellent connect-the-dots book for beginners and includes fun pictures and word-spelling. Paint by Stickers helps little ones master fine motor skills while creating pictures (and who doesn’t love stickers?). We work together and they complete the pictures by practicing counting, reading, and fine motor skills. It’s a remarkable thing to watch and be a part of! Find My First Dot-to-Dot here and Paint by Stickers here.

Photo courtesy of amazon.com

No Buckle Belts

An invention I didn’t know existing but am sure glad I stumbled across it! Grizzly Bear is a slender fella and has trouble keeping his trousers up. But an ordinary belt is a little tough for him during trips to the bathroom though… With Kindergarten coming up and knowing he wouldn’t have assistance in the washroom, I looked for an alternative and found these! They are so easy to put on and he can remove, put on, and adjust his pants with no trouble at all! Find packs of four here.

Photo courtesy of amazon.com

Watches and Calendars for Kids

Lastly, my parents have recently been teaching my boys about time – when mealtime is, when playtime is, and such for Grizzly Bear, and what “tomorrow” and “yesterday” means for Polar Bear. I joined in the fun by finding the perfect watch for Grizzly and an exciting calendar for Polar Bear. A Disney Marvel watch was exactly what I was looking for (and he LOVES it too). The hour and minute hands are labelled and it has two sets of chapter rings (a stopwatch built right in)! This all helps him learn to tell time, plus Spiderman is swinging into action on the watch face which really pumps up the learning. Find it here. As for Polar Bear, a visual representation to learning about the days of the week and when exactly Christmas is (haha) has helped him loads! He prefers dinosaurs so we went with this awe-inspiring (and eco-friendly) title here.

Fun Farewell!

I hope this little list of my recent family purchases help you and your little one enjoy your time at home! It certainly is fun to stumble across something new and help your little one learn along the way. If you have any new items that you’d like to leave a review for, send them my way – until then, see you next time!

Growing an Herb Garden

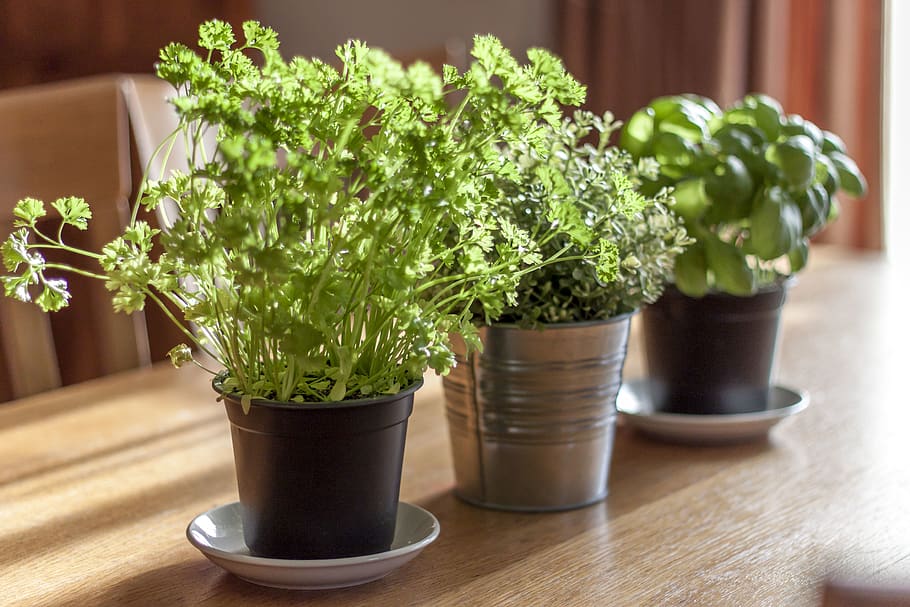
Growing an indoor or outdoor herb garden can be just as useful as it is fun! My boys and I have been working on a few projects since the beginning of 2020 and growing a successful little herb garden has been one of them. Of course it always helps if you have or know of someone with a green thumb. For me, that’s my sister! She taught me a lot of valuable insights when it came to taming chives, splitting parsley pods, and fluffing up basil bushes. If it wasn’t for her, my indoor creations would have been a flop. So now that I’ve mastered a few of these tricks, I’m going to share them with my KARA family! But first, let’s check out the benefits!

Herbaceous Benefits

Herbs have a wide variety of health benefits, including fighting infections (basil), reducing nasal congestion from allergies (rosemary), and relieving nausea and IBS symptoms (peppermint). They are also known to keep teeth healthy and freshen breath! Check out more benefits here.

Michigan State University also advocates that gardening has plenty of developmental benefits for children! Zipping around the lawn with tools and bags of seeds provides practice for gross motor skills. Pinching little seeds and grasping hand tools help develop fine motor skills. Playing with water and soil helps provide children with sensory play. Children are also able to develop reading skills when looking at garden tags, math skills when counting seeds, and a love of nature through nutritional education. And let’s not forget all the fresh air and exercise that are good for every family member! Check it out here.

Green Goodness

So now that we are familiar with the goodness of these greens, let’s start making our own from scratch!

What we need is:

  1. A medium to large pot with holes in the base
  2. Gardening soil (or a glass jar for sprouts)
  3. Seeds of desired herbs

Seeds that we planted included basil, garlic greens, sunflower greens, alfalfa sprouts, and a very cool little plant called burgundy oxalis. We also inherited a pot of chives that we have been mothering diligently.

I chose these plants because they are very easy to grow and work for a variety of dishes. I did try my hand at favourites like cilantro and parsley but found these extraordinarily temperamental. The cilantro came up all spindly and the parsley didn’t even germinate. Oh well – I’ll just have to keep practicing!

So let’s get down to the whys and hows of the plants that were successful! Oxalis burgundy shamrock grows wild in Alberta. Purple basil – nutmeg and basil. Lemon basil. Garlic greens! Alfalfa sprouts 5 days. Sunflower greens. Pea sprout 3 inches

Chives

Chives are the only plant I haven’t kept in my kitchen herbarium. That’s because they do so well outdoors! Chives are a perennial plant (they come back year after year) and can easily be grown indoors and out. Be careful with them though because their beautiful flowers spread seeds like crazy as they try to invade and take over your entire garden. Very edible and delicious, they are an onion that can be used in any pasta dish and can even be enjoyed raw from the garden.

I was lucky to inherit my already well established chives from a friend who planted them in their own large pot. This prevents them from getting out hand. However, as I understand it, chives are best planted and grown in cooler seasons like spring. In early May, my outdoor chives are already starting to bloom! They also prefer sunny spots and to be planted in well-draining, well-composted soil. Ensure that they are planted in the ground or a pot with holes in the base to prevent drowning. Sow seeds 2 inches apart and no more than ¼ inch deep (quite shallow with a sprinkling of soil on top). Harvesting them actually produces more chives if done properly as you can take one third of them by thinning them every couple of weeks. Just pick one stock for every three and you will always have happy chives!

Basil

Basil thrives in a sunny window in well-drained soil. It is super sensitive to cool weather so it sits in my south facing window right next to my kitchen sink. I find some herbs smell even when not cooking and basil is certainly one of them! Its powerful aroma is very pleasant though and really makes doing dishes more delightful.

Sowing seeds is very easy but must be done 10 to 12 inches apart. I only planted one as space was a commodity in my little herbarium, but that didn’t stop the basil from becoming one of the main attractions! It grew into a little tufty plant and if I kept taking leaves from the top, the basil got bushier and bushier on the bottom! Another super cool thing about basil is that you can take a cutting and germinate a new plant! Select a 4 inch section of basil that has not yet flowered and place it in water. Roots should form within a week and you can gift it to a close friend or make a second thriving plant. Totally awesome!

Another note – if you decide to plant purple basil instead of the regular kind, it tastes like nutmeg!

Garlic and Sunflower Greens

This was one plant that resulted from trial and error. My husband decided to grow his own garlic from a clove bought from the store. He brought home some garlic, ate almost all of it, but saved the last clove and buried it in a corner of the herbarium. Within a couple of days it had sprouted into what looked like a green onion stalk, and it didn’t stop there… My husband and I even started measuring its growth day by day, it was growing that fast! We placed a few bets too to see when it would outshine my other plants.  I called my sister to see what her thoughts were. She said that although it would never produce new cloves, the garlic green that was growing, at a surprisingly fast rate, was deliciously edible and very much worth the short amount of time it took to grow. We would chop off the green top little by little to munch on as a snack – absolutely scrumptious!

We later found out we can also do this with sunflower seeds (not roasted ones) harvested from our sunflowers. They make nice little greens that taste great in a salad!

Alphalpha Sprouts

These quick to germinate little sprouts are very easy to grow – and you don’t even need dirt! Just a glass jar and paper towel will work! Place about 2 tablespoons of alfalfa seeds in a glass jar and let them soak in 1½ cups of water overnight (6+ hours). Drain them through the paper towel (or cheese cloth or dish cloth). Put them back in the jar and add ½ cup of fresh water. Swill them around to wash them and drain again. Then leave the jar on its side with paper towel over the opening to allow them to spread out and the moisture to be partially trapped. Repeat the rinsing and draining process every morning and evening for 4 days, always leaving the jar on its side. The sprouts will be roughly 3 to 4 cm in length with green tips when ready to eat. You can then put them in a sealed container in the fried until needed. I also noticed that they lasted longer when wrapped in paper towel then in a baggie. Add to sandwiches and salads for a delectable treat!

Burgundy Oxalis

By far the coolest thing I’ve ever grown, this bushy plant grows easily and tastes exactly like a crisp green apple! For someone who is allergic to apples, this was a very welcome treat. Also known as purple shamrock, this plant is a type of clover. And with that said, it does contain a small amount of acid which can be toxic in high doses. Used in many foods found in the supermarket, the US National Institute of Health notes that it is safe for people who eat a variety of foods.

This plant tends to prefer shade but I’ve left two in my indoor herbarium facing a south facing window and they seem to love it! Both plants have grown into bushy clusters that overtake a few others. If planted in the garden, beware as it likes to get out of control.

Plant burgundy oxalis in well-drained soils and keep it well watered. Plant it in a shadier spot. If you want to keep it growing big but control it from spreading, pluck the little yellow flowers before they bloom. All the leaves, stems and flowers are edible on this plant – but refrain from eating too much!

Our Blossoming Best

So, there you have it. With minimal supplies, you can easily start your own growing adventure. While we’ve discussed several plants, there really are endless possibilities. I recommend that you plant what you most often use in your own cooking. This can be heavily influenced by your favourite cuisines, so if you love Italian food, perhaps basil and thyme might be good choices. If you enjoy Mexican, perhaps cilantro and oregano. Just remember that it’s always nice to try new things! I hope this has been helpful and has inspired you to start down the incredibly rewarding path of beginning your own small garden!

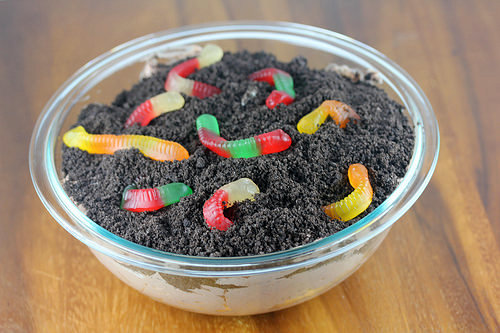
Wormy Mud Cake

Photo courtesy of Blog Chef


As we navigate through this new normal, a few of the folks in my family and close circle are gaining new skills and recalling old ones. For me, I find I’m learning a little of everything here and there that has to do with homelife. I never really did stay at home with my boys when they were born; I took very short maternity leaves. I also didn’t really take a break between school and my career either; I jumped right into it. In this usually fast-paced world, I think that’s true for a lot of parents in my generation.

My parents and grandparents often portray a lot of skills I wish I had practised. My Mom makes the best turkey in the world and my grandmother can knit sweaters better than any machine. My Dad can build nearly anything out of wood and my grandfather was an excellent fisherman. I find these are very important skills that I seemingly lack – and never even noticed until now! So, in this new, and rather independent lifestyle, I’ve taken on a few projects to better hone my skills. These include gardening, fixing broken toys, mending clothing, and cooking.

When my sons’ birthdays started to approach, I realized we normally celebrate with purchased cakes or cupcakes. Even though these items are still fairly accessible, I decided to make a cake my Mom made me when I was a kid – A particularly unhealthy but super fun Wormy Mud Cake! This type of cake also fit in unusually well with the dreary weather we’ve been having as my boys have been helping me in our new earthy, wormy garden lately too!

Flavourful Ingredients:

½ cup of soft butter

8 oz package of cream cheese, softened

½ cup of icing sugar

7 oz of instant chocolate pudding mix (see additional recipe below)

3 ½ cups of milk

12 oz of frozen whipped cream topping

1 package of Oreos or your child’s favourite crumbly cookie

1 package of gummy worms

Fresh mint leaves

Mouthwatering Methods:

Did you know there’s a difference between wet and dry measuring cups? A wet (liquid) measuring cup is a glass/transparent cup, with markings on the side, and typically a spout to allow for easier pouring. A dry measuring cup is typically a cylindrical cup with a handle, and is designed to scoop ingredients like flour, sugar, etc., and then allow the backside of a knife or other utensil to level off the ingredient.  While 1 cup is 1 cup for liquids, regardless of which cup you use, there is an important difference. When measuring something like flour with a wet measuring cup, you have to shake it back and forth to get the top to settle flat. Doing this can actually pack the flour down, resulting in more ingredient than you should have. By using a dry measuring cup, you can scoop out what you need, and then scrape the top flush without packing the flour into the cup. Using too much flour can quickly turn a cake into more of a loaf of bread, so this is an important distinction!

Delectable Directions:

  1. In a medium mixing bowl, combine the butter, cream cheese, and sugar. This is a great activity for your little one, and the mixing action promotes motor skills while also being cool to look at.
  2. In a large mixing bowl, combine milk, pudding mix, and whipped cream topping and mix it up. Again, fun times!
  3. Combine the two mixtures together and let sit while you prepare the Oreo cookies.
  4. Place 10 Oreo cookies into your food processor and blend until smooth. This can be a very fun activity for your child if they don’t mind loud noises. My younger child is not a fan of loud noises so we crumbled our cookies manually by placing them in a large baggie and rolling a rolling pin over them.
  5. Pour alternate layers of the pudding mixture and cookie crumbs into separate glasses or into one large glass pie plate.
  6. Give your worms a new home on the top. My kids really enjoyed this part as we stuffed parts of the worms into the pudding to make it seem as if they were crawling around the top of the dessert.
  7. Place your creations in fridge until cool. This only takes a couple of hours which allowed us to have it for dessert that evening!
  8. When ready to serve, I also topped our muddy creation with fresh mint leaves from my new herb garden!

Sweet Skills for Parents and/or Kids

Learning one’s way around the kitchen is an incredibly important skill which I’m very quickly learning with my family. With the hectic lifestyles we all used to have, and the fact that take-out was easier and more available than ever, the unfortunate result was that we were simply spending less time in the kitchen. This new self-sustaining lifestyle has taught me a few things about kitchen preparedness, different measuring methods, and how to grow my own herbs (to be blogged next time)!

In addition to learning how to make your own meals, working in the kitchen promotes many other positive aspects of children’s development. By encouraging my older child, Grizzly Bear, to help me read and follow recipes, I’ve been helping him develop his math skills, vocabulary, and social skills, not to mention helping him learn his way around the kitchen too! By promoting this fun and rewarding experience, you too can provide your child with important life-long skills!

Appetizing Extras

Looking to make your own instant pudding mix? Check this out for use in this recipe and storage for later days. All that’s needed is to mix 1¼ cups of sugar, 1 cup of cornstarch, 1 cup of milk powder, ¼ cocoa powder, and a pinch of salt. Store in an airtight container for later use! When ready to make your pudding, boil 2 cups of milk with ½ cup of your mixture in a saucepan then simmer for about 5 minutes. Let it cool in a bowl for 10 minutes before serving. Also, if you don’t like that skin that forms at the top of the pudding, press clingwrap to the surface of the pudding before putting in the fridge to cool. Works like a charm!

Exquisite Farewell

Well, I’m sure it goes without saying, this was a fantastic birthday treat for everyone and the kids really enjoyed telling the story of its creation!

I hope this cake makes you eager to try something new too – or at least brings back memories of your favourite childhood treats! Please reach out if you have a favourite birthday cake recipe you want to share! All the best and stay safe!

Making a Birdhouse

Photo courtesy of Birds and Blooms.


The other day, I was visiting my parents when my Dad came in from the garage with a little pile of wood, nails, and a hammer under his arm. He had recently been building a new fence from cedar and had an extra board left over – perfect for making a birdhouse he said! My boys were so excited to help their Grandpa build the birdhouse and get a little taste for woodworking too. And Grandpa was also very impressed with their knowledge and familiarity with tools (I reminded him that their Dad was also an avid woodworker and that they had built me a few birdhouses over the years for Mother’s Day). Well, he said, this should be easy!

My Dad started showing them the pieces and tools. Not every birdhouse is built the same, and all are unique. However, these were the materials he used!

Materials

One 5’ (60”) cedar fence board. Although not necessary, cedar is naturally durable and can outlast the outdoor elements better than most other types of wood, even without protective finishing. It won’t hurt the birds that will hopefully find your project worthy to raise their young and won’t harm your child if he/she decides to take a bite like little Polar Bear!

Hammer

Ruler/measuring tape

1-1/2” Finishing Nails

One heavy picture hanger

Hand Saw. Home centres like Home Depot and Rona will do one cut/piece of wood for free, but if you explain the project, they’ll likely do all of them!

Means of drilling a 1” hole. Again, most home centres will drill a hole for you if you explain the project!

Baby oil for finishing. Baby oil is also another non-toxic finish that makes your project stand out a little, smell pretty, and give your young child a fun, rather non-messy task!

Here are the steps to building a birdhouse with your little one. A little bit of prep is required before inviting your young one to the table though. These first few strides (Steps 1 through 5) are best done on your own, or with a second adult there purely for supervision purposes as you won’t be able to watch both your child and your fingers at the same time! Again, if you don’t have a saw or drill, try taking your project to a home centre for a little bit of free help!

Photo courtesy of Birds and Blooms.


Saws and Cuts

Step 1:

If using a saw, cut two 10 inch lengths from your board. These will make up the front and roof of your birdhouse. The remaining length should be 40 inches.

Step 2:

Drill a hole in the centre of the front board. Usually a 1 inch hole works great for black-capped chickadees or birds of similar size. If the hole is too big, you may attract a different kind of bird or even a squirrel!

Step 3:

Cut one 7 ¾ inch length from your board. This piece is the back of the house. The remaining length should be 32 ¼ inches.

Step 4:

Cut one 4 inch length from your board. This will be the floor. The remaining length of board should be 28 ¼ inches.

Step 5:

Finally, cut one 18 inch length. The remaining piece of your board will be scrap – or the start of another project as my husband likes to think of it!

On the 18 inch board, make one mark at 10 inches on the left side. Transfer your measuring tape/ruler to the right side of the board and make a mark at 8 inches. Connect the two marks with a line (which will be a diagonal line). Make your cut on this line. This will make up the walls of the birdhouse.

Photo courtesy of Birds and Blooms.


Hammer and Nails

This was the part in which Grandpa invited the boys to help. They all sat on the floor with rapt attention and my Dad let them both have a go with the hammer as he held the nail in place (a very brave man indeed!). He always started and finished the nails off to help the project along and keep the boys from losing focus too. It was a pretty awesome and creative project for the group! Here’s how he did it:

Step 6:

Align one wall with the front of the birdhouse and nail them together with a nail at the top and bottom of each piece. Then everyone gets a turn as you repeat this process until you have all walls together. My older Grizzly Bear became a little bossy as he directed the crew and pieces!

Step 7:

Insert the floor of the birdhouse between the walls, and hammer into place. You can do the same for the roof too!

Step 8:


Nail the hanger into the centre of the back wall of your birdhouse.

Step 9:

This step is particularly fun for the littler ones. Use paper towel to dab baby oil over the project to give it a nice finish. It will turn the wood a slightly darker colour, so don’t be shocked if your project suddenly resembles a masterpiece!

Step 10:

Place a nail into your desired fence post and hang the birdhouse. Then spread seed on the ground in front of it. Be careful not to put birdseed directly into the birdhouse. I made this mistake a few years go. It only attracted visitors eager for a feast, not a couple eager to raise a family.

Lastly, keep an eye out for your little visitors! There’s nothing better than doing a little birdwatching with your own little chicks in the early months of spring!

Cooped Up With Kids

The new normal of social distancing coupled with the abysmal springless weather has been making my family feel unnaturally penned up! In fact, as soon as the shops and recreation facilities around us started closing, I got panicked texts from some of my mom friends. “What are we going to do all day if we can’t leave the house?” was a common question.

Unsurprisingly, my family and I have dived into a few new activities to keep ourselves entertained and active! The ideas came from a few coworkers, mom friends, family members, and internet searches. If you are looking for some fun things to do with kids while you’re stuck at home, here are some ideas!

The Royal Tyrell Museum

For Polar Bear’s 3rd birthday, which is coming up in May, my family was planning on making a trip to the Royal Tyrell Museum. Unfortunately, the museum isn’t anticipated to be reopening any time soon but we were able to find this little virtual gem! Take a grand tour at your own pace without leaving the house! You’ll feel like you’re really out and get a chance to educate the little ones while you’re at it – click here.

Start a Garden

Get spring going with a little indoor garden! My family and I started with herbs that sprout really quick, like cilantro and parsley. They go great on any pasta dish and allow us to experience a little spring activity. Add to the garden with your favourite vegetables. You can start the fun indoors with potters and move them outside when the right weather arrives.

Teach your Pet a New Trick

Our family pet is a nine year old dog. She is incredibly smart and as my munchkins grow, they are taking on more of an active role in her care. We started teaching her a few new tricks in our free time, involving her more in our family routines and giving her more attention! My boys really like watching her learn more tricks and she loves the resulting treats!

Create a Family Tree

With the present secluded nature of the world, it’s hard for the family to keep up with our social lives, and the little ones seem to forget friends and family quickly (my older Grizzly Bear was playing MarioKart and told me his ‘friends’ – the NPCs – were winning the game). That’s when I decided to help my boys make a family tree! It helps if you have a printer or pictures of your family to cut out and glue to the tree, it helps them understand who they are and who their family is! Beware though! Too much knowledge has led Grizzly Bear to start calling Grandpa “Mom’s Dad.”

Make a Maze

This timeless game of making a maze on the floor using painter’s tape is a great game for those active kids, especially those too young to read clues in a more advanced treasure hunt. If you have a big space and a little kid, the maze can be for them. If it’s a little space and multiple kids, let the munchkins drive cars or roll balls through the maze. I also brought their new favourite movie, Disney’s Onward, into play by giving them wooden spoons for wizard’s staffs, making little bridges, and placing an orange ball at the end for the Pheonix Gem. They loved it!

Note: If your kids are really into this and you want to enchant it up, write secret messages to them and leave them within the maze using lemon juice invisible ink! Find the secret recipe here.

Have a Tea Party

My kids and I have gotten into tea parties as part of our afternoon snack. It gives me a break from work and a fun get-together for the family. My son’s started quoting a scene from the original Toy Story too – asking me, Mrs. Nesbitt, if I would like some more tea! Adorable. It’s helped them learn some table manners too!

Wii Play and Wii Fit

With the current weather and closed recreation centres, it’s been a challenge for the whole family to get exercise. Luckily, my husband was able to find our old Wii and a couple of active games. My sons’ only foray into the video game world thus far has been Mariokart. With these active games, we’ve now enjoyed tennis, fishing, yoga, and other strength training games. It’s been a great way to get exercise and have fun!

Spring Cleaning

Not everyone’s favourite activity but this extra time at home has really helped my husband and I tackle some much needed home organizing. It’s even helped us save a bit of money too! Rather than driving back and forth to work, going out for dinner, shopping for new items, and spending on recreational activities, we’ve been spending more time with each other and saving funds! This gave me the idea to get some tasks done that I normally wouldn’t have time for, such as repairing old toys and clothing, things that would be too cumbersome normally and would result in purchasing new items! Now my kids and I are fixing things, having fun, learning a bit, and saving money! What a show stopper!

Enclosed

See anything on this short list that inspires you? Notice anything missing? Tell us all about it! We’d love to hear more ideas or know what you and your family are up to! It’s important to feel connected while still staying safe! Give us your ideas to share with others or give us a shout to let us know something new you’ve tried. Hope to hear from your family soon!

Coping During a Pandemic

Naturally, in the current medical climate, there is a lot of room for worry. Our families are at the front of our minds and we are finding ourselves in a different situation than we’ve been used to, and likely one we’ve never faced before.

The World Health Organization officially declared COVID-19 a pandemic on March 11. A pandemic is a global outbreak, occurring over a wide geographic area and affecting an exceptionally high proportion of people. The last pandemic to occur was the H1N1 Influenza outbreak, which was declared in 2009. I was in college practicing to be a nurse when it was declared, but even still, now that I have a family, I’m more engrossed with the COVID-19 situation and ever-watching as it unfolds. I’m sure many of the parents out there feel similarly, and are thinking of their loved ones as they make family decisions. Therefore, to help my family and yours, I’ve sourced and summarized some coping methods specific to pandemics in the hope that they help empower everyone and make family management easier.

The Psychologists’ Association of Alberta has developed a Psychological Coping During a Pandemic Fact Sheet to help everyone understand normal responses to abnormal events. Such normal responses include anxiety, unrealistic fears, and strong defensive actions. They’ve given recommendations to help improve psychological responses and advice on when to seek help. Let’s walk through the recommendations together.

Staying informed but not overloaded – This is easy to understand but hard to accomplish. With the pandemic currently affecting all of us around the globe, and Alberta just recently joining the fight, the news highlights little else. On top of that, we are living in a time sure to be known as the social media era. It’s hard not to get sucked into conversations regarding the current situation and the current political decisions regarding it. However, I’ve found a little path that I’ve managed to walk regarding social media distancing: I check government websites (Alberta Health Services, the World Health Organization, Public Health Agency of Canada, & the US Center for Disease Control are all reliable information sources) and join the conversation with a few select colleagues whom I find calming in nature. Government websites provides relevant, prompt facts that are not inundated with gossip, and naturally calming people provide social support, as well as points of view that are not anxiety producing. It’s been a few days since I’ve distanced myself from the exceptionally wide world of information and I do already feel less stressed and more able to make sound decisions regarding precautions.

Staying physically healthy – I truly believe the sudden stresses (as well as the time of year) associated with the pandemic declaration are causing some of those around me to come down with the common cold or other common illness. Stress reduces the body’s ability to ward off any illness; therefore, keeping a healthy lifestyle, even in the middle of winter with recreation facility closures, is important. How can we do this? My son and I have found a way. Youtube! Earlier this year, I had planned for us to take a yoga class together down the street at the local recreation centre. Unfortunately, we never got our chance. Therefore, I Amazon’d ourselves a couple of yoga mats and we’ve started working out to Youtube yoga videos every night before bed. It’s been such a hit that I know we will keep it up even after facilities open again. It’s easier on the pocket book and he loves the variety we can get!

Maintaining perspective – “Our government needs to prepare for possible worst-case scenarios in order to protect the public. The public, however, does not need to expect the worst.” Reading this really opened my eyes as to the direction local media was going – perhaps they were blowing things out of proportion a bit, emphasizing every story and repeating tragic news. Yes, our government is making changes that really impact us citizens, but that does not mean the worst case is going to transpire. All of the measures being taken are preventative and are made to prepare, not panic.

Build your and your family’s resilience – Resilience is a profound mental tool that can help in any situation. Building mental resilience takes effort and time, but it’s incredibly beneficial. How to do it? There are many ways, and here are some of the ways that have helped me: practicing thought awareness by preventing negative thoughts from derailing your mental track; practicing cognitive restructuring, such as building positive thoughts and changing the way you perceive new thoughts; choosing positive responses to mistakes, such as letting things go and learning from them; and building your social network to include people that make you a better person. For resilience building exercises, check this resource out.

Communicate with your family – Discuss the news honestly with your family, keeping topics age-appropriate. Many of them may be too young to understand the effects of the current situation, but topics such as hand-washing and covering your cough with your elbow, may help them understand certain aspects and preventative measures. With most children at home now, keeping up with routines is also very important in reducing anxiety in children. Try maintaining a schedule that does not conflict with social distancing policies, like arts and crafts time or outdoor walks. Remember that children will watch your behaviors and emotions for cues on how to manage their own feelings. You may want to limit your family’s media consumption to help reduce collective anxiety.

Making a plan – Developing a plan for a possible outcome, such as prolonged isolation, job loss, or diagnosis, could really help lessen anxiety. Know the correct way to monitor for illness, manage symptoms, and report a suspected case. These details can be found here. Keeping up-to-date on emergency financial assistance (to be available for applications next week at alberta.ca) can also help alleviate stress. Those with mortgages and who qualify can also request to defer mortgage payments for up to six months to help cope financially. Lastly, ensure your household, close friends, and neighbours are aware of plans so that everyone feels supported and strengthened together. You can make a buddy system for checking on each other or helping with errands in the event support is needed. Visit the Federal government’s website on emergency preparedness for more great info.

Seek additional help – Those that feel overwhelmed or have prolonged reactions that negatively affect their daily activities can seek professional help by calling Edmonton’s Mental Health Crisis Services Distress Line. It’s a confidential service provided seven days a week to those requiring additional mental help. Find more info here.

Working Together

All of us at KARA do miss our KARA families and hope these tips on managing stress will empower all of our families during this time. We hope to see you all again when it’s safe to resume programs and look forward to working together again! Stay safe and take care!

Child Photography

Children are always so photographic, with their dimply smiles, wild hair, and endless playfulness. I’ve always wanted to cover my walls in photographs of my children – what parent doesn’t! And with the numerous social media platforms enabling us to share pictures with others, it’s nice to be able to send the best pictures of my kids to my family. However, even with the easy access to photographic children and shareable media, it’s still difficult because children never seem to stop moving!

Nonetheless, over the last couple of years, I’ve met some moms who’ve given me some pro tips on being a successful amateur child photographer. I’ve used quite a few of these different tactics and have found that some work very well at catching that perfect emotional or adventurous portrait. So, I’ve compiled them here for you too, in the hopes that you get what you desire – the perfect picture of your family!

Cameras for Candids

Before getting started, be sure to be familiar with the camera and scenery that you are using. Cameras range in both price and practicality. The camera on a smartphone is a great choice if not looking to invest in something bigger but it has a few limitations when taking shots of moving or shadowy targets. Compact cameras are great for busy families and can be purchased on a budget. I’ve always liked simple cameras that aren’t too difficult to use as whipping it out fast is imperative for those once-in-a-lifetime shots. But the bigger and more functional cameras can also allow you to get stunning candids that can be blown up for a big wall canvas. You can find more on camera types here.

Personally, I use a Nikon D5300 as it was given to me as a gift. This camera generally runs around $500 so it’s actually on the cheaper side of the spectrum. It’s given me some astounding photos of my children though and has been simple to use and adjust for my needs. I believe as long as you are familiar with your camera, it should do you well!

Portrait Particulars

As for scenery, lighting is your object of manipulation. For the best and brightest photos, I always take pictures outside on cloudless days. This provides the best backdrop and lighting to highlight my children’s activities. Almost every photograph is wall worthy if taken outside I’ve found. However, not all memories are made in the wonderful outdoors. Some of my best captured images were taken indoors with bright lighting, natural light, or mirrors.

Natural light and artificial light tend to mix unwell, giving harsh undertones or strange shadows to a picture. I try to choose one or the other when trying to get the perfect shot. Natural light that comes through your windows is soft and mood captivating. Artificial light, when it’s bright and everywhere, can produce outstanding photos (ever wonder why the best selfies are shot in bathrooms)? Mirrors can also provide more light to a shot, if your child will look into one long enough!

The Uncooperative Child

Now that we’ve covered the minor basics (the easy part), let’s look at how to capture candids of those moving targets! Not every kid wants to have their own personal parental paparazzi, so catching them in the zone can be a little tricky. Here are those pro tips from the moms I’ve met with some photographing experience!

  1. Embrace Their Desires

To get your desired picture, you’ve got to give a little! What do your children love to do most in the world? Is it dressing up as a superhero? Jumping wildly into a pile of leaves? Cuddling on the couch with their favourite stuffed animal? Let them do it while you snap away to get that perfect portrait! Letting them do exactly what they want will put the biggest smile on their face and will also help you capture the memory of their favourite pastime. A win-win!

  1. Play a Game

This little trick of misdirection can work wonders on tantrums, chores, and even photography! Invent a game to get your child to do the image you’re trying to capture. If you want a running shot, throw a soccer ball. If you want a goofy shot, play Simon-says with them. If you must have a messy shot, help them finger-paint a picture. Make a game out of the picture and watch them get creative!

  1. Time Your Work

Your child or children do have a schedule to keep. It may not be as diligent as yours, or as precise, but it does make a huge difference in their lives if the schedule is disrupted. You will never get the goofy shots when your child is tired, or the cuddly shots when your child is playful. Work to the schedule you’ve built for them already and you will have tons more luck nabbing that perfect candid!

  1. Let Them be the Photographer

Every child is curious, always wanting to see or do what their parent is doing. Give them a chance behind the lens if they should give this indication. It could help quench their thirst for knowledge a smidge and also give you an opportunity to get a selfie! My children have had so many opportunities to take photos now that they happily let me snap away and then come see the photos afterwards!

Kinds of Candids

There are many different kinds of photography – landscape, architectural, sports, wildlife, aerial, etc.

But when it comes to my kids, I’ve landed on a few that make my heart melt to look at. I’ve listed them as well, and my tips on how to capture them for your wall!

  1. Action Shots

I love taking photos of my kids when they are in the middle of playing particularly active games. To do this without getting a blurry photo, I had to try a few different things. One, I learned the best action shots are taken outside. If taken inside, I had to really brighten my home! Next, I had to focus the camera’s centre on my child. This meant I would not be able to get a photo of them running past me, but more a photo of them running at me. Last, I had to increase my camera’s shutter speed and turn on the continuous shooting mode. These functions are typically on every camera other than phone cameras. If you are using a phone camera, the other tip you can try is to shoot often. This is not an ideal solution but sometimes you will catch that one-in-a-million shot!

  1. Silhouette Shots

Another type of fun shot that can be produced by manipulating lighting is the silhouette shot. I find silhouette shots (or black and white photos) make the best dramatic pictures. Many moms-to-be or new moms get these dramatic shots taken of them, and they make lovely, soft, emotional photos. Other silhouette shots that are hilarious (and super contrasting to the softer photos) are the imaginary play shots. I think the best ones are when children dress up in their favourite costumes and act out their wildest imaginary stories. These are likely the most fun indoor shots for toddlers and preschoolers too!  Turn out the lights, and let the natural lights from the windows make shadows of your kids on the walls. Try to capture both your child and their shadow in the shot. They will love to make more for you once they see what you’re trying to achieve!

  1. Sensitive Shots

I have found that these photos are the easiest ones to take as they only seem to require dramatic lighting and cuddly child. To get the best results, I like to use dark backgrounds for black and white photos (coupled with dark clothing colours and your child’s face will really stand out). If you want a colourful sensitive photo, I also like to shoot with the sun behind my child. It makes for a pretty neat silhouette portrait that’s soft and dreamy in nature.

  1. Portraits

Portraits are easy to take if your child is unnaturally cooperative! They often require a steady hand and a large pile of chocolate for bribery purposes. I find any camera is able to handle these shots too, especially if taken one of two ways: have your child look up at you while you take the picture (vertical shot) or use a mirror for horizontal shots. The vertical shot, when you’re standing and looking down at your child, emphasizes your child’s eyes. Children naturally have large heads and their eyes tend to pop when looking up. These photos make heart-melting portraits. The horizontal shot, just a simple head-on photo, is easiest to take in a mirror I find. You take the photo of the mirror while your child looks into it. This prop helps scatter light all over your child’s face while giving them something to focus on.

  1. Scenery Shots

These shots are also particularly easy to take but require good lighting and a pleasant backdrop, such as the golden hour and the glorious outdoors. These shots focus less on individuals and more on the group, perfect for family action shots! Get the gang together for their favourite pastime and snap away! Shoot away from the sun during the golden hour. The golden hour is the hour after sunrise or the hour before sunset. This time period makes soft, warm pictures. To get more vibrant pictures, I take pictures in the middle of the day and then play with the camera effects to enhance the colours. It helps to focus on one colour, like the background, to do this. Use elevation to your advantage, like being at the bottom of a hill and looking up at everyone to catch the blue sky, or vice versa, to catch the green grass.

Snappy Happy

Well there you have it! Please feel free to use any of these tips to get that perfect picture of the child or family! Also, please don’t forget that I’m still learning the ins and outs of the child photography world and any tips for me are greatly appreciated! Leave your comment for the KARA family or just for me! All are welcome and happy photographing!

Potty Training, Round Two

Potty Training, Round Two

More experienced and better prepared, potty training our second child should have been a breeze, right?

It certainly wasn’t though…

We started just as we did with our first; we bought a small, toddler-sized potty. We got one from IKEA. In my experience, they are the best. They are very well priced and look kind of comfortable (I’ve never tested it, I swear). They also wash easily and come in a very pleasing green colour.

After choosing the right potty for our trainee, it was all uphill.

I recall trying something different this time: ‘acquainting’ our young Polar Bear with the potty before diving right into the affair. We would put Polar Bear on the potty every once in a while, abandoning it for weeks at a time. We also kept it in the rooms we were currently playing in. We think these two differences helped him familiarize himself with his new potty‑shaped friend but, and probably more importantly, it also prevented my husband and I from losing our minds. Keeping a toddler on a potty is tough enough, even with all the mental gadgets we can entertain them with. But our strong-willed and boisterous Polar Bear was too much of a match for us anyway, and sadly, he knew it.

In this beginning stage, we would also ‘announce’ whenever one of us had to use the washroom. I’m not sure if this helped him but I thought it would clue him in to the fact that potty-training wasn’t so different from what everyone else was doing – and that going in a potty was a ‘normal event’.

He was a curious and insightful youngster and he picked up most things quickly. For instance, he knew to hold his pee and run like the dickens when the time called for it. He also loved to flush the potty (what kid doesn’t?) and would spend lengthy amounts of time “washing his hands” if I let him.

The next step, though, was focusing on his number twos. While Polar Bear was a natural at determining his bodily functions and needs, he greatly disliked going number two on the potty. He, like many of us I’m sure, preferred the piece and quiet of a nice smelling library or the comfort of antique furniture. He would disappear for a short length of time and when called, would not respond. It wasn’t long before my husband and I determined his usual haunts; under the walnut table, behind the mahogany piano, inside the oak cabinet, under Grandpa’s cedar desk. He also had to do his business whenever we entered a lumber store. He had a type and it wasn’t hard for me to picture him reading a newspaper at his leisure while knowingly disobeying us.

Well, we had our hands full. And it only became more entertaining.

On an outing one day at the mall, just the two of us, Polar Bear told me very quietly that it was time. Normally, my young and stubborn lad would hold in his number two until we got home, refusing to go in a public washroom, as piece and quiet were his element. Exhilarated and shocked, I practically flew with him on my back to the nearest washroom. We catapulted inside and I placed him on the potty, breathless with anticipation. He stared at me with big, doe-shaped eyes, shaking his head, essentially embarrassed at my antics. But he complied and sat obediently.

And we waited.

And waited. We were alone in the public washroom, something I was remarkably thankful for. This could be it! I recall verbally encouraging him, “Yes, you can do it,” “Push, push, push,” “You’ve got this, you’re such a big boy.” But alas, he eventually declared he didn’t have to go and referenced how he peed, and that that should be good enough.

Crestfallen, I pulled up his trousers and made him wait while I used the washroom. As I sat down to go, a couple of girls entered the washroom and occupied some stalls next to ours. They were chatting away through the cubicles, comparing their purchases and prices.

Polar Bear was playing with a toy car he held in his hand for a moment. Then, noticing that I was on the potty, came right over to me. He looked at me with such concern in his eyes, placing his hand on one of my shoulders.

“Push, Mommy, Push!” he started screeching out loud. “Go, poop! You can do it!”

The girls in the cubicles next to us erupted into hysterical laughter as my face became the colour of a ripe strawberry. My jaw dropped and admittedly I began to shake with laughter too as I tried to shush my son, who persistently continued to encourage me to poop in the potty.

So shocked and embarrassed was I, that I kept my son in our cubicle until the girls had left the washroom, leaving it only when I was certain they would be long gone, likely telling anyone who would listen along the way.

Well, children are nonetheless the most entertaining portion of my life, leaving me shaking my head and smiling with disbelief. Polar Bear did eventually potty train successfully. It only took observant parents who watched his every move to halt his ‘disappearing acts.’

Shockingly, Polar Bear also started moving his potty to his favourite places to obtain the piece and quiet he sought.  A clever boy to boot.

With reflection, every child is indeed different. And we’ve all learned a thing or two!

Valentine’s Day Crafts

Valentine’s Day is such a cute holiday to celebrate with little ones! Kids can exchange cards, parents can gift chocolates, and even the littlest ones can get dressed up in heart-shaped attire. It’s an adorable time for everyone!

This Valentine’s Day (and the 14 days leading up to it), I’ll be babysitting my niece and nephew. I really do have my hands full with four kids under five in the house but I thought it would be beneficial for everyone to let the magic of crafts entertain them! That’s why I’ve decided to post a little something on lovey-dovey crafts that will excite and inspire the munchkins! I’ve found a little something for everyone to partake in too – as I have a one year old Sun Bear, a two year old Polar Bear, a three year old Panda Bear, and a four year old Grizzly Bear. If you’re feeling as adventurous as me this week, give it a glittery whirl too!

Photo courtesy of Easy Peasy and Fun.


Infants

Even little babies can benefit from arts and crafts time. The bright colours, messy feel of paint, and fun interactions with parents can boost developmental skills – plus the resulting craft is a wonderful keepsake! Bonus, this craft works well for all ages but it is one of the few that is possible to do with infants.

This Valentine’s craft idea is a super cute, heart-shaped tree! Here is what you will need:

One sheet of white paper

Washable ink pads or finger paint (varying colours)

One black marker

Start by drawing a tree trunk on the white paper with the black marker. Then you can use your child’s feet, hands, or fingerprints to outline a heart at the top of the tree where the leaves would be. If you use your child’s fingerprints, it honestly looks the best as it resembles leaves but your child may not be old enough to retain his or her attention for long enough to do this. If your child is quite young, I recommend using his or her feet and angle the footprints so they resemble a heart. It takes just seconds but it’s a fun one for you and an interesting activity for them!

This craft worked best on my three year old Panda Bear. It was captivating enough for him, as opposed to Grizzly Bear who found it boring, but it also held his attention, which was not the case for the younger two.

Photo courtesy of Events to Celebrate.


Toddlers

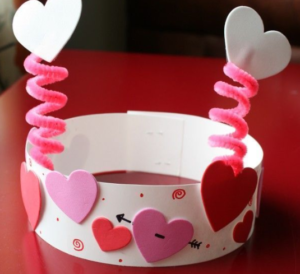
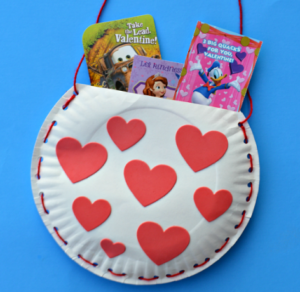
Toddlers, along with most age groups, love two things – messy art and art that doubles as accessories. So I helped the kids make springy heart crowns and fashionable purses. Both Sun Bear and Polar Bear loved these crafts!

Here’s what you’ll need for the crowns:

White and red paper (thick construction paper works best)

Pipe cleaner (various colours)

White glue

Scissors

Bowl

Q-tips

Use the scissors to cut long strips out of the white paper. You’ll need two strips to glue together, end to end, to make a crown-shaped hat for your child. It’s best to measure the paper against your child’s head before gluing. Cut out little hearts from the red paper.

Now put a dollop of glue into a small bowl. Give a Q-tip to each of the kids partaking in the craft and show them how to apply the glue to the red hearts using the Q-tip. This increases fine motor skills while also reducing the resulting mess from using the glue bottle. Bonus, it also prevents kids from fighting over the glue bottle. Panda bear was best at this stage too. He didn’t load on the glue like Grizzly Bear and he was by far cleaner than the others!

When the crowns are decorated, poke holes in the white paper to insert the pipe cleaners. Twist the pipe cleaners around themselves to keep them pointing upwards. You can then use your finger to twist the remaining pipe cleaner portions to give them bounce. Poke holes through a few hearts to add them to the pipe cleaners to give the crown extra flare. Allow the kids to show off their creations to each other! Polar Bear wore his crown for a full day, often wearing his and others’ whenever possible!

Photo courtesy of The Resourceful Mama.


Here’s what you’ll need for the purses:

Two paper plates per purse

Red construction paper (or other colour)

Pipe cleaner (various colours)

White glue

Scissors

Bowl

Q-tips

Use the scissors to cut a third off the top of each paper plate (instead of cutting the plate in half, cut it a little bigger on one side than the other). Discard the smaller portions. Poke holes along the outside perimeters of the plates. Cut multiple red hearts (or other colour) out of the construction paper.

Allow the kids to try winding the pipe cleaner through the holes of the paper plates. You may have to really help with this part as the objective is to stitch the two plates together with the cut portions at the top, being the opening of the purse. You will also use pipe cleaner to make the purse strap that the child can use to carry it around. Grizzly Bear was superior at manipulating his pipe cleaner. All three of the others gave it a valiant effort before manipulating me into doing it!

Put a dollop of glue into a small bowl and give a Q-tip to each of the kids partaking in the craft. Show them how to apply the glue to the red hearts using the Q-tip. Again, this is huge for fine motor skills while reducing the resulting mess from using the glue bottle. And no little bear arguments!

Allow them to decorate and wear their purses/man-bags around the house in a beary cute fashion show! This craft was a hit with all of the munchkins, even if a few pink hearts made it on to the blue-hearted man-bags! This was hugely popular with Sun Bear though, as she is only a few months into walking so a shoulder bag toy was a hit!

Photo courtesy of The Resourceful Mama.


Preschoolers

All of the kids partook in these punny card crafts too, although my four year old Grizzly Bear got the most enjoyment out of them by far!

We made two types of punny cards for his friends and relatives and they both landed Grizzly Bear in fits of giggles. He would march all over and chatter to anyone who would listen to him make the jokes over and over. It was too cute watching him get the joke behind it and genuinely laugh each time!

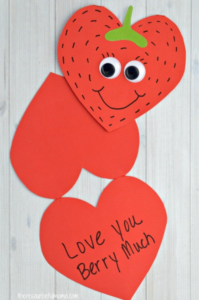
Here’s what you’ll need for punny card number one:

Red construction paper

Green construction paper

A black marker

Scissors

Bowl

Glue

Q-tips

First, fold the red paper in half along the long edge. This will allow you to make four cards. To make one card, cut large hearts out of the folded paper (when you cut the heart shape, you will get two hearts as you are cutting two pieces together). Be careful not to cut the hearts apart (you need to leave two sections at the top of the heart together so that the card opens like a card). Cut a small green ‘T’ shape out of the green paper.

Let your child make little black dots on the card’s face and use the glue and Q-tips (dollop of glue in a small bowl and apply with the Q-tip) to apply the green stem. When finished, the card should resemble a strawberry.

Inside the card, write the words “I Love You Berry Much.”

If your child is on the verge of kindergarten, or has a knack for using a pencil, help them to write the words. I have started teaching Grizzly Bear how to spell by writing words out in dots for him to trace over them. He then connects the dots to spell the words. He is getting quite good at all of his letters and has even starting stringing them together to read.

Photo courtesy of Surviving a Teacher’s Salary


Here’s what you’ll need for punny card number two:

Yellow construction paper

Orange or brown construction paper

Red construction paper (or other)

A black marker

Scissors

Bowl

Glue

Q-tips

This one pun lasted days and I bet it will give your child a laugh, especially if they like pizza.

First, fold the yellow paper in half along the short edge. This will allow you to make eight cards. Cut out isosceles triangles (to make pizza shaped cards). When you cut the triangle shape, you will get two triangles as you are cutting two pieces together. Be careful not to cut the triangles apart (you need to leave the top section of the triangle together so that the card opens like a card). Cut rectangular or trapezoid shaped ‘pizza crusts’ out of the orange or brown construction paper. Try to eyeball them to be the same shape as the crust side of the ‘pizza.’ Cut small hearts out of the red paper (or other colour) to be used as ‘pepperoni.’

Let your child use the glue and Q-tips (dollop of glue in a small bowl and apply with the Q-tip) to apply the ‘pepperoni’ hearts. The boys in my group seemed to prefer green ‘pepperoni,’ which I found a little disconcerting.

Inside the card, write the words “Here’s a Pizza My Heart.”

Again, if your child is curious when it comes to the written language, help him or her write the words. You can write words out in dots for him or her to trace over. He or she can then connect the dots to spell the words – Remarkable!

The Big Day

I really hope these ideas give you and your family some fun this Valentine’s Day! They have certainly kept me busy (well, busier!) and we’ve loved every minute of it! They’ve also helped all of the kids in my care build some pretty neat skills. Please feel free to give any one of them a try and let me know how it goes!

Have a sweet Valentine’s!