Building Social Skills

About a year ago, I had lunch with my sister’s mother-in-law-to-be. We were meeting for the first time and she didn’t know who I was, just that I was to be a bridesmaid at the wedding we were both attending.

After the lunch was over, and all the planning had taken place, we got up and walked out together. On the front step of the restaurant, she asked, “Are you her sister?”

I was actually shocked because my sister and I don’t look anything alike and most people don’t jump to that assumption. We have very different skin tones, hair colour, and eye colour. One hundred percent different appearances actually. I said, “Yes! How did you know?”

“You both have the exact same social skills.”

That was the answer I received.

Although my sister and I look like we come from different worlds, this stranger knew we were closely related because of how we behaved in social situations. She must be extraordinarily observant, right? The next Sherlock Holmes?

The Importance

Developing proper social skills is extremely important and should start at a very young age. They’re important because they are an integral part of a functioning society, and even more importantly, they are an integral part of building self-worth and a healthy personal identity. Social skills can dictate how someone will handle pressure and responsibility. They allow someone to make lasting friendships and help interviewees land their dream jobs. They support meaningful communications with strangers and close friends alike in everyday scenarios, helping people properly handle stress and face challenges – they even allow highly tuned strangers to make very accurate predictions to familial connections! From family life, to school life, to work life, and on. Social skills can be a person’s ticket to every kind of encounter.

Fortunately, I knew this even before I was a mom, but the problem was I wasn’t entirely sure how to go about building good skills in my kids. How does one even develop these skills? How did I?

After my encounter with my sister’s soon-to-be-mother-in-law, it was evident to me that there must be a common link somewhere. I was told she could tell who I was by my hand gestures, how I nodded my head when she was talking, and even how I scrunched up my nose when confused. All of this is a form of communication and is how I communicated my feelings without even saying them!

After assuring me she was not the long, lost descendant of a fictional character, I began to think about that common link. As well as my own children and their social skills.

Lead By Example

Now that I’m grown up and am learned in my own brand of social skills (ones that even give away my identity!), how do I promote good social skills in my own kids?

Well one of KARA’s newest newsletters is called Developing Good Friendships and has some great examples of good social skills, such as making eye contact, taking turns sharing information and stories, using facial expressions, and using proper assertiveness to communicate needs.

How can I promote these examples in my own home? Do I have any examples I already do on a daily basis? Luckily, many came to mind!

  1. Eye Contact – When my chatty five year old, Grizzly Bear, comes bounding into the room to show me his newest invention, I do make sure to pull my eyes away from the screen I’m looking at to have a proper conversation with him. Learning to put down my phone or tear my face away from any form of technology to have a real conversation is so important to me. Growing up, my family had a very primitive computer and we almost never used it. My parents always made proper eye contact with me when I had something to say, so I practice this good behaviour with my children. Long story short, I feel like my kids have great eye contact and know that their stories are coming across to me.
  2. Taking Turns – Many families share a story time routine in their families. When I was a kid, this was done on the walk home from school. My parents would meet us after a long day and we’d all share a story telling time that focused on what happened that day and why we did or did not have a good day. As my munchkins aren’t in school yet, and they love running rather than walking, we do story sharing time during our evening tooth brushing session. While I brush one child’s teeth, the other can tell us about his day. When I switch kids, the other one has a turn. This way, my kids get to share story telling time, do a little show and tell, and I get to learn a little more about how their day went.
  3. Facial Expressions – Littler ones, I find, have a very hard time expressing how they feel. Their short sentences of forgotten or made-up words are, luckily, accompanied by the most expressive facial expressions, which are surely the most communicative part of any story, allowing us to piece together their thoughts. My three year old Polar Bear has many dramatic stories, which usually involve big words. He does have a slight tendency to use the letter “L” in words that don’t require it. For me, his Mom, I’m quite used to his jargon and can decipher nearly all of his musings. However, when speaking to his Grandpa, the two seem to communicate purely through facial expressions and sound effects! How do they know how to do this? When my tots were really little, I used facial expressions to encourage them to do something, like eat their spinach. Choo choo! When I was little, my parents also used expressions to show empathy when I got an ouchy. As we’ve all grown, it seems we all still use these facial expressions during all of our social experiences to help us communicate. Who knew!
  4. Assertiveness – My parents always encouraged us kids to have confidence by allowing us to take our turns sharing our feelings, praising us for practicing, letting us lead activities, and, most importantly, listening to us. Now with my own kids, I also practice these habits in my home and my children, luckily, and with a lot of encouragement, are confident in their communication skills. They are always able to express their needs – even when their needs are more of a want like ice cream! It is so important that they know how to communicate their concerns as well as their musings, and grow as individuals with a healthy appetite for expressing themselves!

Now that I’ve gone through all of these personal examples, I can see the common link my sister and I share! Can you? Yes, we are two dynamite ladies, but that isn’t it. It’s because we have two dynamite parents. J

Role Modelling During COVID

Yes, proper communication skills and assertiveness can allow children to better handle stress, pressures, responsibilities, emotions, and challenges. It may also help instil positive role modelling behaviour into them for when they become parents!

And yes, role modelling is the most effective way to develop these important skills. And the best role models are caregivers – the people whom children see and learn from every day. Which is very lucky when considering these unprecedented times!

When the pandemic first started, I was one of the many, many parents who worried about my children’s development as I grappled with the decision of pulling them out of daycare and educational programming. How were they going to learn how to build relationships? How were they going to learn positive social skills if they weren’t hanging out with youngsters their own ages? It’s a well known fact that young children’s brains develop at warp speed – how could I chance skipping these prime developmental years?

The fact, and a fact I didn’t know until I did some research, is that I wouldn’t have to choose social skills over health. Not by a long shot.

According to Dr. Kathy Hirsh-Pasek, my children have everything they need to develop proper social skills within the four walls of our home. Dr. Kathy Hirsh-Pasek is an infant language specialist working in the Department of Psychology at Temple University. She is world renowned for her contributions to developmental psychology research pertaining to young children and says that the most important thing for children to know during the pandemic is that they are loved and safe. Kai-leé Berke, a senior advisor at Promise Venture Studios for early childhood experts and former CEO of Teaching Strategies, says the most important social interactions are those with their home base, whoever that may be. And I believe it! When I was a kid, I lived on a farm far away from friends. I didn’t have a cell phone to communicate with people and we only had a chance to do a few social outings here and there before we started school. So you see, if we really want our children to learn how to build relationships, then we can do it even under quarantine, because the practice happens with us, the caregivers/role models!

A Final Word

Caregiver role modelling had a lot to do with my social skills. And it has a lot to do with my children’s. More than any other early childhood relationship experience. It’s what made me me – and what made my sister so darn like me.

However, should you feel like getting in some additional fun, family experiences that allow for more out‑of-the-home communication for your child but still within the safety net of your four walls, here are some quick ideas! Let your child draw a picture for his/her friend and mail it to them! Build a block tower, take a photo, and text it to a cousin! Video call grandparents! And chat with neighbours behind your fence! All of these allow for social distancing while still building social skills.

Have fun and stay social – it can change a life!

Fall Crafts and Décor Ideas

Ever peruse the magazines in the grocery store lineup before checking out? This time of year, I can’t help but look at all the fancy covers of living rooms decorated in bright reds, smashing oranges, and vibrant yellows – they all look so warm and cozy! Some years when I’m in a creative mood, I strive to make my home look as inviting as those. And this year, I’ve come up with a few ideas to help!

Four of these décor ideas are crafts for kids and parents to make together and one is for parents to make and kids to artistically display! Let’s dive right in!

Image sourced from Worth Writing For

Handprint Tree

Nothing quite says fall like a colourful tree. As a kid, I remember making this craft in school and bringing it home to my parents. I loved this craft so much, I even somewhat incorporated it into my wedding (I had a large painted canvas of a tree which people left fingerprints on as my guest book). Now I’m back with my kids making this craft – full circle!

This craft is ideal for the younger children just learning their way around glue, like ages 1 to 2 years. Keep a close eye on tots so things don’t end up in their mouths!

What you need:

  1. Construction paper
  2. Red, orange, and yellow leaves, tissue paper, or paint
  3. Glue or tiny fingers
  4. A brown marker

On a piece of construction paper coloured as per your child’s choosing, colour a brown tree trunk with the marker. If you’re not the artistic type, using your hand and forearm (or your child’s hand and forearm) can really help and give it a more personal touch. The forearm can be the trunk of the tree and the fingers can be the branches.

Use glue to add real leaves collected from outside (more environmentally friendly and a chance for adventure and education). If unavailable, you can also use coloured tissue paper or painted fingerprints! This craft is terrific for teaching your child about the environment and seasons (to be ahead of the game for preschool), and promotes fine motor skills! Also, throughout the crafting process, your child will also develop communication skills, social skills, and develop a healthy sense of self-esteem. Woohoo!

To add to your home décor, I find the best priced photo frames can be purchased at Canadian Tire! Who would have thought! I received ten different shaped ones for ten dollars in a multipack. The only downside is that they don’t always carry them so I have to keep checking whenever I’m in. The pro to framing your child’s artwork though is that you’ll have them forever and they make terrific and cost effective décor.

Image source from The Resourceful Mama

Sunflower Plates

Crave a beautiful bouquet of flowers on your table? Already have one but feel like it’s missing something? Add a paper plate sunflower!

This craft a great for busy hands just figuring out children’s sized scissors, like 2 to 3 years old! It also entices them to eat a healthy snack!

What you need:

  1. A paper plate
  2. A popsicle stick
  3. Paper
  4. Yellow and green paint
  5. Glue
  6. Sunflower seeds (in the shell)

Try this out for your vase! You will inspire fine motor skills, communication skills, social skills, and creativity!

Help your child paint the paper plate yellow and the other paper and popsicle stick green (or brown). Let them dry. Help your child cut out small triangles from the paper plate and a leaf or two from the green paper. All sunflowers look different so try not to micro-manage your child but let them experiments on their own. That being said, you know your child’s comfort level and skills better than anyone else – follow your instincts! Lastly, glue a handful of sunflower seeds to the sunflower’s face and the popsicle stick (stem) and leaf to the back. Voila!

To spruce up your kitchen, dining table, or even bathroom, put your flower(s) in a vase. I even sprayed mine with a bit of perfume to take that additional fun step! Afterwards, I was reminded (by the tots) to give them some shelled sunflower seeds as promised.

Image sourced from Home You

Leafy Mason Jars

This very nifty and pretty craft makes a glamorous kind of décor. It’s very pleasing to the eye and all over the fall theme we’re trying to create!

It’s easy but a little messy too, so I recommend for 3 to 4 year olds.

What you need:

  1. A mason jar
  2. Mod podge glue and brush
  3. Leaves

Gather some leaves from your local park and bring them home. Try to pick vibrant, dry leaves but ones that will hold up to a little handling (won’t crumble in your hands). It’s also best to do this sticky project outside if possible and wear old clothing if your child is a little new to glue. Gently brush some mod podge glue onto one side of the mason jar (we used old pickle jars) then stick your leaves on the glue. Mod podge over the leaves once they are on. Do the other side but try to hold the jar by the bottom or top to avoid getting sticky.

This project is great for the tot that has a little patience and enjoys the great outdoors so much that he or she wishes to bring it inside! It develops fine motor skills, and, with any craft project completed as a family, encourages communication and social development too! It’s also environmentally friendly as it uses leaves and recycled items. Win-win!

To decorate your home, nothing could be better! Use the colourful mason jar as a candle holder! It brings beauty and warmth to all! Just be sure to keep candles up high and away from little hands. Also never leave unattended.

Image sourced from The Mad House

Pinecone Hedgehog

This craft is also on the eco-friendly side and terrific for child development! Plus, you’ll get your very own little friend for the table centerpiece!

This craft is ideal for slightly older kids with more patience and who are developing a sense of social responsibility, like 4 to 5 years. Keep a close eye on hot objects!

What you need:

  1. A large pinecone
  2. Brown felt or paper or Play-Doh
  3. Black paint and white glue or a black marker
  4. Googly eyes or a black marker
  5. Hot glue gun (if needed)

There are a lot of options to making your own hedgehog pal. I tried to list the materials for the ones I could think of but feel free to experiment!

We went with the felt and hot glue gun option as we already have the materials and I wanted it to last in my décor bin for years to come.

Find a nice, large pinecone outside (one per hedgehog). Bring it inside and give it a name (my tots chose ‘Prickly’ and ‘Baby’). Cut out some felt or paper faces and ears. You can also use brown Play-Doh and smoosh it into the pinecone on one side, making a little point for its nose. If using felt or paper, mix together equal parts black paint and white glue and make little dots on the face for eyes and a nose (likewise, you can also just draw on a face with a marker). Leave the faces to dry (even the Play-Doh face). Once dry, hot glue gun on the felt or paper face. If using Play-Doh, glue on some googly eyes. You can even cut out and add little feet or pipe-cleaner whiskers to your hedgehog friend.

Again, this craft promotes many developmental skills and coordination in children. It may also promote responsibility if your child choses to carry around and care for a delicate ‘animal’ all day afterwards (be ready with the glue to fix any accidental mishaps!).

For décor ideas, place ‘Prickly’ or ‘Baby’ in your table centrepiece! He will be sure to bring warmth and coziness to your dinner that evening!

Doily Confetti

Ready for the big kid craft? I have always considered myself a big kid when crafting! This one is sure to knock your socks off (or on depending on your skills)!

A few years ago, I started making these tiny, fingernail sized doilies to help decorate for my sister’s bridal shower. I didn’t realize how much I’d fall in love with them or how dedicated I was to making my own personal set. They turned out to be very easy to make so I started making them for my favourite seasons and holidays.

Remember, this is recommended for just big kids (parents). Your tots can help you artistically display them on your dining room table after they’re complete!

What you need:

  1. A very thin crochet hook (B/1-2.25mm is what I use)
  2. Red, brown, orange, and yellow strand floss

This is a very inexpensive craft that looks so cute on any surface! It’s not for the faint hearted though! Watch the video I got started on here. This taught me how to make a slipknot, how to chain, and how to make both single and double crochets.

First make a slipknot, then chain two. Then make eight to ten (depending on the size of your hook) single crochets into the first chain made. You can either stop here and finish off as shown in the video, or, to make a wide variety of doilies, continue with a second round of single crochets, multiple single crochets within each, or double crochets. I chose to try a variety to see which worked best with the strand floss and my crochet hook. I found that one strand floss made 8 to 12 doilies (and strand flosses are $0.79 at Michaels Arts and Crafts Store so this was indeed a very cheap project. I can do this while cozying up on the couch with my munchkins and when all is complete, we can lay them out on our decorated table together with our pinecones and sunflowers!

The End

I really hope you and your kids enjoy these crafty ideas! It really helps bring fall alive and enjoy the last of the sunshine this year! If you have more ideas you’d like to share, please reach out! All the best and happy crafting!

Nutrition and Safety

It was recently brought to my attention that nutrition is a huge component of safety. Now, for those avid readers of my blog, it’s no secret that responsible nutrition is a passion of mine and I’ve written other blogs on it. In this blog, I hope to examine the nutrition component of safety and how we can use this knowledge to make safer choices for ourselves and our families.

Dr. Mike Wahl has used this analogy to describe safety and how we currently view safety.

Imagine Sherlock Holmes and Dr. Watson sitting in a tent in the middle of a field at night. The reason they are out there is because there is a thief in the woods and they are staking it out in order to catch him. Dr. Watson turns to Sherlock Holmes and asks, “What do you see?”

Sherlock Holmes replies with, “I see stars. There are probably planets around the stars. Probably a few of the planets are like ours. That means that some of the planets probably have lifeforms. And maybe some of those lifeforms are intelligent. Which means that someone else somewhere is looking back at us and asking ‘what do you see?’”

And Dr. Watson replies, “I see the stars too, which means our tent was stolen.”

And the thief makes off with the tent.

This analogy shows that we’ve dived so deep down the rabbit hole that we don’t see what’s right in front of us. We are so focused on parts of safety that are, in all likelihood emergency type scenarios, but are so unlikely to happen to us, that we aren’t focusing on the everyday safety. And a very large part of the everyday safety is what we eat.

Sugars

First off, let’s look at sugars because it’s the culprit we all struggle with. I’m also going to come back to sugars later in another example, but for now, let’s look at the different kinds of sugars.

Why is it that when we Google ‘sugar,’ a big picture of granulated white dust with a logo pops up? No matter where we turn in our modern lives, sugar is there. The reason – the people selling it are fully aware that it is addictive.

But we need sugar to survive, right? Correct, we do need it. But there are different kinds of sugars, and for the sake of our health, it’s important to recognize and understand the differences.

So what is the difference? Well, the difference is the package it comes in. Back in the day before processed foods ever made it on to grocery store shelves, sugar only came in the form of fruits, vegetables, breastmilk, honey, and other raw foods. Throughout human evolution, our bodies adapted to eating these forms of sugar – sugar that lasts a long time in our bodies because it comes in a package that contains other healthy ingredients, like fibre, vitamins, and minerals. These are called complex sugars (complex carbohydrates). Our bodies are genetically designed to digest these packages slowly, giving us a sustainable amount of sugar to go about our daily functions.

So what is the difference from natural sugar packages and processed sugar packages? Well, that’s just it. Natural sugars come in a package that takes time to digest and only a portion of the package is sugar. Processed sugar packages are not packages at all. They are 100% sugar. And it takes no time at all to digest it and society on average eats ten times what our great-grandparents used to eat.

That’s right, more processed sugar and in greater quantities.

What does this mean to our health? Imagine taking a leisurely stroll through the park. This lovely and relaxing walk takes you 20 minutes to complete and you’ve travelled probably 2 km. This is what it’s like to eat natural sugar packages. Now say you’ve decided to take a jet plane home. You travel the same distance in 20 seconds. Your knuckles are white from clenching the seat in front of you as your eyes are about to pop out of your head. Your mind is buzzing, going “What on earth just happened?”

Yes, that’s what your body is saying when you eat refined, processed, quick to digest, no-package sugar. It isn’t sustainable and your body feels overloaded.

So what does your body do to combat this overload? Well, when we have elevated blood sugar levels, our bodies release insulin, which is like a key to opening our cells for storage. It takes the high levels of sugar out of circulation so we don’t damage our blood vessels. Sugar in the blood stream really is like little razor blades. It causes little scratches all along the walls. The insulin keys, thankfully, take it out of our circulation system and store it in muscle cells, liver cells, and fat cells.

Problem solved, right? Unfortunately, when I eat fish, I’m the only one who doesn’t smell it. That’s because I’ve been sitting around it for so long, I’ve been desensitized to the smell. Even more unfortunately, insulin can become desensitized too. It doesn’t recognize the sugar after a while because it’s constantly there. This, very unfortunately, can lead to diabetes.

So why are we hungry again after eating sugar? The reason is because of insulin spikes. If we sit down and demolish a box of cookies (I’m guilty of this from time to time), our body reacts by pumping out insulin to counteract the huge amount of damage to our blood vessels. We actually pump out so much insulin to protect ourselves that our body is in a binge mode – “it’s too much, don’t keep any of it, get rid of it all as fast as possible!” This insulin spike lasts about an hour before dropping off. We didn’t use any of the sugar we just inhaled, we stored it all. Now our body is looking for more and we experience this as hunger. Also worth noting, these spikes and drop-offs greatly affect moods and can even result in depression.

Why is sugar so addictive? Simply, sugar releases endorphins. This, shockingly, is the same hormone we get from some kinds of illegal drugs. But, upliftingly, it’s also released when we hug our children, smile at someone, or go for a run!

What can we do instead of eating processed sugar? Well, again, we need sugar to survive. We need sugar that is meant for our bodies in order to get energy to move, function, think, and feel. We can eat natural forms of sugar! Sugar that comes in a package with other ingredients and gives us sustainable, long-lasting energy. So bust out that bag of apples!

Proteins

Now let’s move on to our bodies and how we are built. Dr. Mike Wahl likes to use the analogy of building a house, and when I blog about raising children, I like to use a house as well. So I’m going to use it here too.

When you are building a house, you have a budget. This budget can be like calories. We count calories like money, and have a certain budget when it comes to consumption. So if we are building a house, and we spend 95% of the budget on one thing, like the landscaping (dream come true), the rest of the house can’t be built. That’s why we need to think of every aspect of the house, and every aspect of our diet. And split the costs evenly throughout the different food groups.

To build a house, we need three things: the construction materials, the workers, and the transport. The construction materials are like proteins. They hold stuff up and keep the structure strong. When we think of proteins, we think of meat. Don’t worry about it, everyone does, even Google again.

But the best kinds of proteins come from foods without legs. In fact, leg counting is key to eating the best proteins with the least amount of unhealthy additives.

Let me explain. Beans, lentils, eggs, fish – none of these have legs and they are the healthiest sources of proteins. What comes next – chickens, which only have two legs. Chicken breast is healthier for you than the drumstick, and it’s also farther from the legs (spatially on the chicken). Then comes pigs and cows. The more legs, the less healthy the protein.

One super cool research topic that I read about recently (last night) was about the Blue Zones. This term was coined back in 2005 and I stumbled across it while doing some personal research. The Blue Zones are areas on the planet where people appear to live a very long time. It’s not uncommon for people in these zones to live to 100 years and lead very healthy lives. One researcher went to all of these zones to compare the eating habits of the local peoples and found that their main source of protein was beans! Ninety-five percent of their diet is plant-based, meaning they only eat meat around five times a month. If you are interested in following up, you can check it out here.

Sugars (Again)

Let’s come back to sugars again now that we are aware of the different kinds.

In our house analogy, sugars are the workers. Fruits, roots, vegetables, and legumes give us the energy we use throughout the day. The reason we need the packaged or complex sugars is that it comes in small amounts and lasts all day.

Imagine your worksite. The building materials (proteins) are all there lying on the ground. You need workers to start work. You eat a bunch of jellybeans.

Instead of having a manageable amount of workers complete tasks all day, you have an overload of workers for a very short period of time. The plumbers, electricians, scaffolders, and everyone else shows up at once! The supervisor, which is your brain, doesn’t know what to do so you send them all away to wait on the sideline. Now you have a bunch of material still laying on the ground and a crowd of people not doing anything. Wouldn’t it be much better to have a steady amount of energy that lasts the entire day? The right workers showing up at the right time?

Fats

Lastly, we have fats. Fats have a negative stigma around them simply because they are called fats and everyone is on a “low fat” diet. That is because different kinds of fats were only discovered recently (within the last couple of decades). And, just like sugars, there are good and bad kinds. And we need the good ones.

Good fats provide the mode of transport. They literally grease the roads to move faster. Bad fats cause plaque in your arteries which is also known as high cholesterol.

If you have a three lane highway (a major artery in your body), and you clog up two of the lanes, things begin to move rather slowly. Even if you have the best workers (sugars) trying to move the best building materials (proteins) calories can buy, it won’t matter if they can’t make it to the job site. And that can be a problem.

But good fats to the rescue! Because good fats actually slick the roads up again and get things moving! You can reverse any damage by eating the good kinds. Wonderful, huh?

So how can you tell the difference between the good and bad kinds? Well, again like sugar, it’s easy. Take a look at the foods at room temperature. If it is liquid at room temperature, it is a good fat. Nut oils, fish oils, avocado oils, and others are good fats. If you don’t cook much (guilty), just eat the fish, nuts, and avocados!

Bad fats are things like butter, bacon, steak, etc. At room temperature, they are solid and clog up our transportation networks in our house analogy and in our own veins running through our bodies. I learned this about a year ago, before which, I used to love butter. Now when I look at butter, all I can see is it smeared throughout my circulatory system and, I’m sure you’ll understand, I don’t crave it anymore!

Again, I can’ take credit for this analogy. I was inspired by Dr. Mike Wahl and wanted to tell a little of his story to you. To see more from Dr. Mike Wahl and how nutrition can influence your daily life and longevity, check out his story here.

In Summary

So you see, nutrition has an extraordinary ability to affect our health and safety, and it’s our choice whether it affects us positively or negatively.

How is your house coming together and what foods do you think should make the cut? How did reading this change or not change your mind about foods and how they affect your and your family’s safety? We covered a lot of topics and even took brief looks at diabetes, depression, and high cholesterol. Nutrition really is the closest and most attainable health choice we can make for our families. I know that after writing this blog, I feel like I need to go over my grocery list again!

But first, I will leave you with this one final tidbit that I was given a long time ago by my grandfather. It really helped before I was so nutrition savvy – if in doubt, stick to the outside perimeter of the grocery store. It covers most of the good, raw foods. The inside isles are where one can get lost.

Good luck and please reach out with any questions!

Improving Self-esteem

“Self-confidence is my four year old asking me to turn off the ceiling fan so he can show me how high he jumps” – Anonymous

If you subscribe to KARA’s newsletter, the most recent edition is all about growing children’s self‑esteem. This is an amazing addition to KARA’s new online portfolio but it’s also a chance for my family to see what we are doing correctly and what we can improve on! Read about it here.

According to Making Children Mind Without Losing Yours, there are three important points to consider when helping your child develop a healthy sense of self-esteem: acceptance, belonging, and competence. This got me thinking about the methods my family has used, how we have succeeded, and ways in which we can improve as parents. So I’ve done a little reflecting to see where we’ve excelled and areas where we still need work – as every personal and family journey is a work in progress!

Acceptance

It’s important for each child to know they are unique and valuable in their own personal way, but also to know that they are accepted for the person they are! Mistakes are simply just that – mistakes – and they are still loved and worthy of acceptance and respect.

This key message for parents really stood out to me as an area in which my family excels! My kids are quite fond of messy play, tardy chore time, and even dangerous climbing and acrobatic games. Whenever our little gaffers do something unique, even making mistakes as they go, the grown-ups in my family praise them and make them feel special for their unique gifts. I feel like it just comes naturally to us to say, “You’re my special guy,” “You always make the best Lego dragon,” and “Wow, that’s a cool new way to do that!”

With any little or big mistake the kids get up to, my husband and I always get down on our knees to be at the same eye level with our kids. We have always found this really gives them the respect they deserve and decreases any potential feelings of being ‘talked down to.’ We also use calm voices and explain why what they did was a mistake. “You can’t pull on the back of someone’s shirt because it could make them fall. That would hurt them and no one likes getting hurt.”

The coolest part is that we think these traits are projecting onto our children, increasing their ability to accept others for their awesomeness and even mistakes. We’ve often heard the two of them conversing on their own while playing, saying things like, “Great job, little brother, I like your sand castle,” and “That’s okay big brother, I’m not hurt.”

Of course, the little dreamy voice of a toddler telling his big bro his mistake was forgivable was simply heart-melting!

Belonging

Helping a child of any age learn that they matter to others, and have people that support them, is crucial to positive development. Knowing that they have a place that they fit in and that their needs and feelings are important and honoured by their family is imperative if they are to be healthy emotionally.

After reading about this key message, I thought back to a time when my youngest son, Polar Bear, and I had a disagreement. This story ties in with both belonging and acceptance, and was a beautiful moment I will never forget.

Polar Bear had taken a late nap in the car that evening, and, as a result, was having trouble sleeping that night. Any parent knows how frustrating it can be as you watch the minutes and hours pass by on the clock, dreading how you’re going to feel come morning. I admit I lost my cool and threw my own temper tantrum, obviously scaring him. Upon returning him to his own bed, I felt ashamed. He was now even worse off than he was before – and so was I. Instead of ignoring the moment, I owned it. I laid down beside him and told him that Mommy was sorry, that I shouldn’t have yelled, and that he didn’t deserve to be treated like that. By doing this, I felt that I showed him he matters to me, that I care about him, and that his feelings are important. His immediate reaction was to look straight at me and ask, “Mommy’s sorry?” Then he gave me a big smile and a hug.

Even though it was a little sad, it was a lovely moment that the two of us shared. I will certainly never forget that my child needs to know that his feelings matter to me, and that he was so good to forgive (and accept) me for my mistakes as well.

Competence

It is my family’s personal belief that each opportunity to increase a child’s skills should be undertaken with great care and enthusiasm! Helping a child understand that they have the abilities to take risks and learn new skills will help boost their confidence and allow them to try new things – whether it be making the most delicious imaginary tea or learning how to write the entire alphabet!

I know that each little one in my family has big dreams, and I only expect those dreams to grow – so I want to be the support they need to meet their personal goals. This means letting them know that they have unique talents, their contributions are valuable, and that they can be their own resource when it comes to problem solving! In later life, this competence helps us continue to try, knowing that success cannot be reached without a little perseverance.

One big event that has happened recently is that my Grizzly Bear has learned to ride his bike without training wheels. After two years of using a balance bike, he finally received a pedal bike for his 5th birthday. While he had mastered the balance required of bike riding, training wheels enabled him to focus on learning how to pedal. He’s a very sensitive child, and can get down on himself easily when things don’t work the way he thinks they should quickly enough, so this was a bit of a challenge for both us and him. Sometimes he would want to give up, to which we would encourage (but not force) him to keep trying. If he did decide that was enough for one day (or even one outing), that was fine. We knew to accept his boundaries, and while it’s important to always encourage your children to expand their horizons, it’s equally (if not more) important to respect their needs and be patient with their learning style. Often it would be only be a few hours later and we’d say we were going for a walk, and ask if he wanted to walk or try his bicycle again, and the answer was always to try the bicycle again. By keeping the experience as positive as we could on our end, despite his own reservations, he always wanted to try again. In no time (and two crashes later), he was excited to remove the training wheels. Once they were off, combining the two skills (pedaling and balancing) seemed to make him feel like he was back at square one, but our approach did not change – we kept encouraging him to meet his goal! He often asked if we could put his training wheels back on, but after asking if he was sure he didn’t want to just take a break, he’d soon be back at it. It also required a great deal of trust between us – but we’ve been building that relationship for 5 years!

Within a couple of weeks, he’d learned enough to ride his bike with confidence, and we learned a little more on how to develop competence.

Extras

If you feel like learning a little more about developing a child’s self-esteem, check out the KARA Newsletter linked at the top of this page. It has great info on the life-long learning positives of the self‑esteem boosting key messages. It also has a wide variety of strategies to try, books to read, and activities to partake in!

Also feel free to contact me for any more self-esteem boosting stories. I hope these ones have inspired you but I have plenty more if interested! All the best and take care!

How to Make Paper

Thinking of doing a little schoolwork with your young family to get in the back-to-school mood? I certainly was a few days ago. Since we decided to homeschool our little kindergartener, I’ve been stocking up on cool, educational ideas that I feel align with our chosen school’s curriculum. I started by asking around for inspiration, and luckily, my very talented and artsy niece gave me this awesome idea – how to make your own paper!

Making your own paper is fun, eco-friendly, and developmentally motivating (for both kids and parents).

The paper is made from recycled bits of old paper, so kids can see your or their old projects become something new again and learn the importance of recycling. Recycling greatly reduces the amount of stuff that ends up in the landfill. It also helps us reduce our resource uptake, which saves the environment and our pocket books.

This activity is also messy play at its best so it helps increase sensory, motor, hand-eye coordination, and social skills. Not to mention – it’s incredibly fun!

Prep Your Play Space

So now that I’ve sold you, you’re wondering where to begin? Let’s start with clearing a spot for the activity. I like to do all messy crafts on the floor of my kitchen during cooler days and on my patio during hotter ones. I also like to lie old paper down but since the old paper is one of our key ingredients here, perhaps just use an old towel or do it right on the floor’s surface.

Next, grab your mixings and artsy utensils:

  1. A stack of old paper (my niece used all of last year’s homework while my kids used their old artwork)
  2. A soup pot filled with water
  3. Scissors, both adult and children’s
  4. A colander
  5. A large screen
  6. A few towels

Let’s Get Messy!

The best part about this activity is that all of it can be done with the kids. With their little kid scissors, tiny hands, and huge imaginations, they can participate in every step!

  1. Cut all of the paper up into tiny pieces (if your kids are anything like mine, they will be masters at making tiny pieces of paper that seem to multiply when glanced at)
  2. Put all of the tiny pieces into the tub of water
  3. Mash them up with many hands, big smiles, and tons of laughter
  4. Strain the soupy mix with the colander
  5. Spread the wet mulch onto the large screen into the desired shape and thickness (you can even use cookie cutters to make desired shapes!)
  6. Put a towel over the screen and flip the paper onto it
  7. Lay it on a table or other surface to dry overnight
  8. Wake up the following morning and colour that new masterpiece!

Cool Additions

After doing this neat project that was both hilarious and entertaining, my niece also gave us some cool tips to try for next time. These include adding seeds, flower petals, leaves, or even food colouring to give the paper some cool tints! I know my munchkins are eager to try this activity again and we will be sure to make these additions!

Until Next Time

I hope you and your little ones have a chance to try this cool activity and even learn a thing or two about development and the importance of recycling. For more info on teaching your kids about recycling and a few more educational activities, click here. For more information on the importance of messy play and how to encourage it in your home, check out this link. If you have any questions or comments, please feel free to share! Until next time, have yourself a wonderful paper-making experience!

Treasure Hunting for Kids

Being engaged with your children is very important, and with the short summers we get in Edmonton, making the most of those few precious days of sunshine can mean a summer well-spent. One activity my family has recently become involved with is ‘geocaching.’

You might have heard the term before. If not (like me a couple weeks ago), let me catch you up! You can think of geocaching as a sort of ‘treasure hunt,’ except instead of an old, wrinkly map (which is also fun!), you’re given GPS coordinates!

For the avid adult geocachers, sometimes these treasures or ‘caches’ are extremely hard to find. They can be located in remote areas that require days of hiking and, because they’re well out of service areas, a professional grade satellite GPS unit. This hardly seems like the kind of adventure to undertake with little ones, right? Luckily, there are plenty of kid-friendly hunts in and around the city, often in our own glorious river valley, which we are so fortunate to have! For these types of hunts, your smartphone, some sunscreen, a few snacks, and water bottles are all you need!

How to Find Your Cache

In order to complete geocaching with your kids, you need to have a smartphone and download the geocaching app. The app will allow you to follow the trail to your next cache and even track the caches that you find! And there are so many for the Edmonton area! You’ll never be at a loss for weekend treasure hunts!

Go here to get the app.

Like I said, you won’t need a pen and notepad because the app tracks it for you but I found my kids preferred the old-fashioned method anyway so we brought them with us!

After you have the app, check the difficulty level of the hunt. For little ones on a hot day, I would try a larger sized hunt with lots of caches. This is because it will be easier to find them and you can quit at any time with just an easy “Okay guys, last treasure!”

It’s easier to pull them away if you’ve already found a number of caches!

When you find your cache, you can check it off on your phone or on your handy notepad!

Making Your Own Cache

Once your kids have had the pleasure of finding a few caches, maybe your family can even make their own! Choose a small trinket from around your house and let your child choose a public spot to hide it. I recommend also placing the item in a waterproof container to prevent it from damage. Then hide it in your secret spot!

If your cache is going to show up for other users, you’ll have to use the app to add it to an existing geocache. Go to your secret location and the app will prompt you to go through the steps of adding it. My kids liked this part because we could watch how many people came by to find our cache!

Old Fashioned Treasure Hunt

Now, remember that old, wrinkly map I mentioned? If you want your kids to have the same old fashioned experience as you (or maybe Grandpa) had, perhaps you’ll find the time to make your own hunt!

Gather a bunch of your children’s toys (maybe not their favourites) and hide them around your yard or out in your favourite park. As mentioned, try to use waterproof items so they can return safely home. Then make a map! Or maybe two or three…

My kids are great sharers but even the best sharers can get a little excited and rip a piece of paper. I would even make an original for me if I’ve done a big hunt and can’t remember where I’ve left stuff. You can even make it look like an authentic map by pouring cold tea (or coffee) over it and leaving it overnight to dry. My parents also used to rip or roll the edges to give it that heavily used look.

Another tip for your homemade map is to put everything in picture form. This will help even the littlest hunter have a chance to find that treasure!

Lastly, roll up the map and tie it with a bit of string to provide that pirate look we’re going for. Voila!

Treasure Hunter Precautions

If your kids are anything like mine, nothing gets them more excited than the idea of seeking out hidden treasure. While most of the geocaches are simply books for those to sign, some include little trading items (often just gently used toys that other kids have grown out of) which work on a ‘take-one, leave‑one’ system.

With COVID cases on a slight rise again, I don’t let me kids touch any of the objects but that doesn’t matter to them! Finding the treasure and marking it down on their little notepads is all the fun they’ll ever need!

Other precautions are taken to beat the heat. Make sure to lather everyone up with your favourite sunscreen and bring plenty of water. My go-to for sunscreen comes in a spray-on can for ease of application. My kids don’t seem to ever stand still for long so this helps a lot! Find it here. As for our favourite water bottles, these ones from David’s Tea are the best I’ve ever used! They are like a regular water bottle, which helps keep them clean because there is no straw! Also, the bottom comes off! This allows me to add ice cubes to the mix and allows for an even more effective clean! Find them here!

Let the Adventure Begin!

I hope you have a great time outdoors with your family this season! Even with all of the changes we are currently going through, perhaps this little outdoor adventure gives your family an excuse to enjoy the sunshine!

At Home Pedicures

As wonderful as professional salon services are, it’s hard to justify the cost. It’s even harder to justify the risk of affecting your family’s health. Therefore, my Mom and I have starting taking self-care into our own hands during this new normal, including at home pedicures!

Now, my mom is the guru when it comes to salon style beauty, so I grabbed some tips from her. We also took some hints from her magazine collection (which also came in handy as our relaxation reading material). So if you want a fun girl’s afternoon, but are really into saving some money and keeping your family safe, try these out for size!

Materials

  1. One basin per person, large enough for both feet
  2. Nail polish remover
  3. Cotton pads or Q-tips
  4. Pumice stone
  5. Foot file
  6. Nail trimmer (scissors or clippers)
  7. Nail file or buffer
  8. Cuticle pusher or orange stick
  9. Cuticle cutters
  10. Moisturizer
  11. Toe Separators
  12. Base polish
  13. Nail polish
  14. Top coat
  15. Magazines/Romance Comedy Movie/Spa Music

Before getting off on the wrong foot, I know this list looks a little exhaustive – but have no fear! You can improvise or skip steps and you will still have a good time and good-looking toes! Now that we know that, let’s just jump right in!

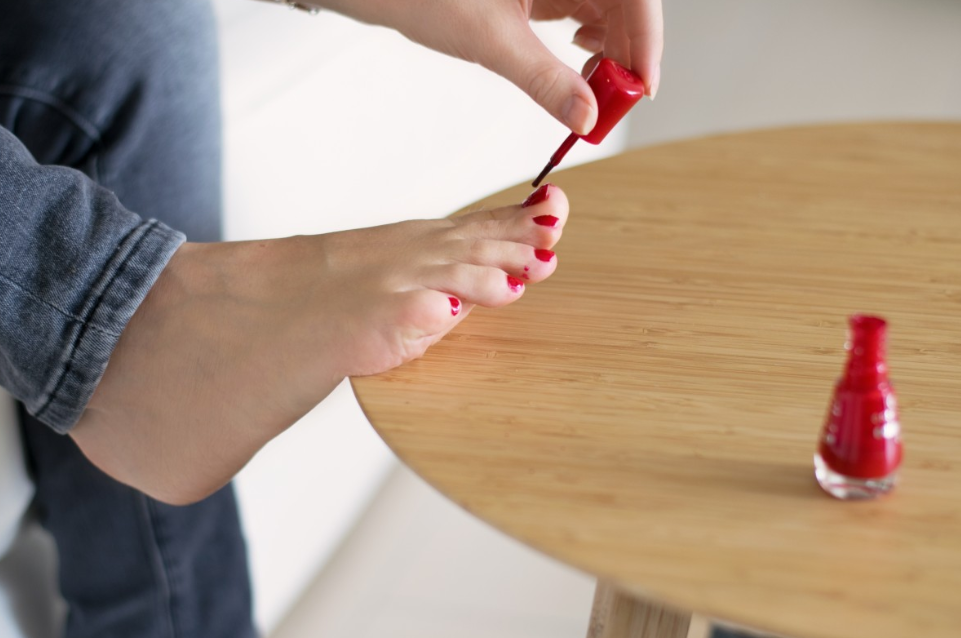
Step 1. Prep your tools and work station. We put on a romantic comedy movie and busted out some chips and dip. If I were to do a pedicure alone, I likely would have put on spa music but to each there own! Also fill your basins with hot water. Add any desired perfumes or salts for added pampering.

Step 2. Remove old nail polish with your nail polish remover and cotton pads. Put the pad over the bottle top and invert it for a brief second to allow the pad to soak up some of the liquid. Then use the wet cotton pad to clean your nails. It’s definitely easier to remove the polish if you let the pad sit on your nail for roughly 10 seconds, letting the nail polish absorb the acetone. Then wipe all the access away. If you aren’t wearing any nail polish, it’s still a good idea to clean your nails this way as it removes dirt and grease too!

Step 3. Next, soak your feet in the basin. Every ten minutes or so, you can pull them out to scrub the dry spots with a pumice stone or other callous remover tool. Never use anything sharp or attempt to cut off dry spots as this can be potentially dangerous. Soaking your feet before scrubbing the areas will drastically help remove any dead skin, and will eventually make your feet baby smooth again, even if it takes multiple tries. Just keep soaking and scrubbing! If you find the pumice stone or other scrubbing tool is not working for you, I actually preferred using my own nails. Worked just as well!

Step 4. After soaking and scrubbing, if your skin still needs a little extra love, dry them and use a foot file. This works best if your feet are dry as the skin comes off in a powder-like form, making your skin softer.

Step 5. Clip your nails with a pair of nail scissors or clippers. Personally, I prefer ordinary finger nail clippers. I find toe nail clippers or scissors too hard to maneuver and regular nail clippers allow me to get a straight cut across the nail. I also prefer to keep my nails short to prevent them from getting caught on anything. I also wear an odd variety of shoes and having short nails allows my feet to be comfortable in any toe shape. When cutting your nails, be sure not to too far back on the corners as this can lead to ingrown toenails – super painful!

Step 6. File the new cuts with a nail file. I used a nail buffer to do this, brushing the nail in a downward motion rather than from side to side. This made the cuts very soft to the touch and not at all sharp. I also buffed the rest of the nail a smidge, which I was told would help the nail polish stick on better!

Step 7. Use a cuticle pusher to gently push your cuticles and expose the new nail growth. This was always my least favourite part of getting a professional pedicure because it was always kind of painful! Now that I’m in the driver seat, I can gently perform this task, making it a lot more pleasant and just as nice looking! Afterwards, you may notice the extra skin built up around your nails and may want to remove it. If it makes you more comfortable, you can use a pair of cuticle cutters to remove it but go slow to avoid any tears to your skin. Feel free to buff again with your nail buffer!

Step 8. After all the scrubbing, cutting, filing, and buffing, your feet may look a little caked in powder. Go ahead and remove as much excess as possible with a cloth or paper towel. You can then use your moisturizer to soften and pamper your feet! If you’re avid reader of my blogs, I’m sure it will come as no surprise to you that I used coconut oil. As well as the many health properties coconuts have, they are also known to be a great anti-aging moisturizer as well as being better for the planet than traditional lotions.

Step 9. At this stage, your feet may look and feel amazing and you may feel good enough to just walk away. I almost did until my Mom pulled out a shiny, clear nail gloss. So we busted out the toe separators! Before putting these bad boys on, I was told to give my toes and feet a little stretch to help with the awkward feeling of the separators.

Step 10. Once separated, run another acetone soaked cotton ball over the nails again to remove the oil from the previous steps. If putting on coloured nail polish, I was advised that a base coat would keep the polish from chipping. We also read that a quick buff from a nail buffer would do the trick so it’s personal preference (or availability)!

Step 11. Next apply your polish! I went with a clear shine but I find any lighter colours look great in summer, especially with your summertime tan! Use your brush and always go from the left-most toe to the right-most toe if right-handed and vice versa if left-handed. This prevents unconsciously smearing the previously painted toe! Also, if you have small nails and often flood the base with polish, an orange stick or Q-tip can help clean it up. If you don’t have either, you can always use your fingernail or paper towel. Paint your toes with two coats, letting dry between coats, to get an even colour and prevent chips.

Step 12. Before adding your top coat, clean up the skin with an acetone soaked Q-tip or paper towel. You’re then free to add that top coat and finish your rom-com as you let them dry!

Last Foot

I hope you were able to get your foot in the door with these pedicure tips! If you have a cool self-pampering tip, sweep me off my feet with it! Until next time, stay safe and sane!

Toy and Clothing Reviews

Photo courtesy of amazon.com

Toy sales have taken a strange turn during this new normal. I’ve certainly noticed the new pricing system for many of my favourite goods, including foods, clothing, and activity toys. Lots of things are on for better deals now, although my family has had to make some adjustments in how we shop, allowing us to be a little more thrifty. Here’s what we’ve noticed (or read):

  1. Activity toys and puzzle sales have skyrocketed since the closing of schools, and has really made my family happy to have more options and products available. We’ve been preparing for Kindergarten and it’s lovely to see more books, puzzle, and educational toys offered online.
  2. Used clothing and toy stores have closed, including my favourite Once Upon a Child. This has so far been the only negative we’ve noticed as it has made it a touch more difficult in getting quality items for low prices.
  3. Many clothing and toy stores are promoting large sales and more delivery options. We’ve been fortunate to find great deals on clothing (which is helpful as we are no longer able to purchase used) and complete curbside pickup at certain locations.
  4. The closing of many stores has caused a sharp decline in impulse buying, particularly for my family. We no longer see something we didn’t need and purchase small, inexpensive toys or clothing that really add up after a while.
  5. The new normal of purchasing and selection has really enabled me to complete adequate research on items and think about budget before spending. This is a huge benefit to us!

All of these observations have allowed us to save money and (in an obscure way) spend more time with our boys! Let me now share with you some of the great finds we’ve come across!

Photo courtesy of pinterest.com

Kinetic Sand

Kinetic sand is an amazing alternative to Play-doh or slime. We’ve been a Play-doh family since the beginning and more recently were introduced to slime. Both of these are great messy toys but they sure do make a mess! Personally, I don’t mind the mess, but I don’t particularly like how short lasting these two options are by drying out so quick. Enter Kinetic sand! A soft, malleable sand that sticks together and doesn’t dry out! It’s also easier to clean off of clothes and the floor by being so sticky to itself. My boys use it primarily in their “baking” game where they make me delicious sand cookies. Coming in many cool colours and providing endless hours of fun, this was a winner in this home! You can find it on most online shopping browsers, but if you order from Mastermind Toys, the order came very quickly for us and they do curbside pickup! Find it here.

Photo courtesy of pinterest.com

Globber 3 in 1 Scooter

The Globber 3 in 1 scooter is a super cool activity toy that has given my youngster a running start at keeping up with his big bro. It reminds me of a convertible carseat with its ability to turn from a ride-on toy to a scooter in two easy steps. My Polar Bear can sit on his seat while I maneuver to keep up with Grizzly Bear on his bike, or he can putter around on his own, practicing his footwork. A little extravagant but a great one for any little one! Find it here.

Photo courtesy of amazon.com

My First Dot-to-Dot Book and Paint by Stickers

Grizzly Bear is incredible at reading at writing, even for his young age, and Polar Bear is quickly mastering his numbers. They have always loved books and learning new things but there weren’t many books that they found just as enjoyable as educational. In preparing Grizzly Bear for Kindergarten and Polar Bear for Preschool, I’ve done my research and found a few greats in the many that are out there – and these are the two that really stuck out for all of us! My First Dot-to-Dot is an excellent connect-the-dots book for beginners and includes fun pictures and word-spelling. Paint by Stickers helps little ones master fine motor skills while creating pictures (and who doesn’t love stickers?). We work together and they complete the pictures by practicing counting, reading, and fine motor skills. It’s a remarkable thing to watch and be a part of! Find My First Dot-to-Dot here and Paint by Stickers here.

Photo courtesy of amazon.com

No Buckle Belts

An invention I didn’t know existing but am sure glad I stumbled across it! Grizzly Bear is a slender fella and has trouble keeping his trousers up. But an ordinary belt is a little tough for him during trips to the bathroom though… With Kindergarten coming up and knowing he wouldn’t have assistance in the washroom, I looked for an alternative and found these! They are so easy to put on and he can remove, put on, and adjust his pants with no trouble at all! Find packs of four here.

Photo courtesy of amazon.com

Watches and Calendars for Kids

Lastly, my parents have recently been teaching my boys about time – when mealtime is, when playtime is, and such for Grizzly Bear, and what “tomorrow” and “yesterday” means for Polar Bear. I joined in the fun by finding the perfect watch for Grizzly and an exciting calendar for Polar Bear. A Disney Marvel watch was exactly what I was looking for (and he LOVES it too). The hour and minute hands are labelled and it has two sets of chapter rings (a stopwatch built right in)! This all helps him learn to tell time, plus Spiderman is swinging into action on the watch face which really pumps up the learning. Find it here. As for Polar Bear, a visual representation to learning about the days of the week and when exactly Christmas is (haha) has helped him loads! He prefers dinosaurs so we went with this awe-inspiring (and eco-friendly) title here.

Fun Farewell!

I hope this little list of my recent family purchases help you and your little one enjoy your time at home! It certainly is fun to stumble across something new and help your little one learn along the way. If you have any new items that you’d like to leave a review for, send them my way – until then, see you next time!

Wormy Mud Cake

Photo courtesy of Blog Chef


As we navigate through this new normal, a few of the folks in my family and close circle are gaining new skills and recalling old ones. For me, I find I’m learning a little of everything here and there that has to do with homelife. I never really did stay at home with my boys when they were born; I took very short maternity leaves. I also didn’t really take a break between school and my career either; I jumped right into it. In this usually fast-paced world, I think that’s true for a lot of parents in my generation.

My parents and grandparents often portray a lot of skills I wish I had practised. My Mom makes the best turkey in the world and my grandmother can knit sweaters better than any machine. My Dad can build nearly anything out of wood and my grandfather was an excellent fisherman. I find these are very important skills that I seemingly lack – and never even noticed until now! So, in this new, and rather independent lifestyle, I’ve taken on a few projects to better hone my skills. These include gardening, fixing broken toys, mending clothing, and cooking.

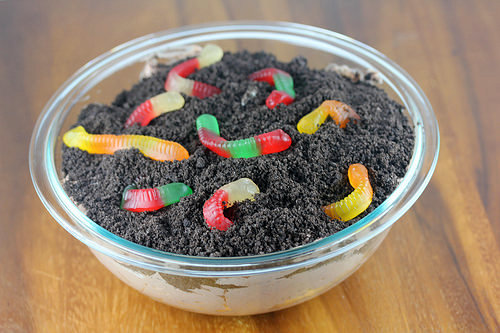
When my sons’ birthdays started to approach, I realized we normally celebrate with purchased cakes or cupcakes. Even though these items are still fairly accessible, I decided to make a cake my Mom made me when I was a kid – A particularly unhealthy but super fun Wormy Mud Cake! This type of cake also fit in unusually well with the dreary weather we’ve been having as my boys have been helping me in our new earthy, wormy garden lately too!

Flavourful Ingredients:

½ cup of soft butter

8 oz package of cream cheese, softened

½ cup of icing sugar

7 oz of instant chocolate pudding mix (see additional recipe below)

3 ½ cups of milk

12 oz of frozen whipped cream topping

1 package of Oreos or your child’s favourite crumbly cookie

1 package of gummy worms

Fresh mint leaves

Mouthwatering Methods:

Did you know there’s a difference between wet and dry measuring cups? A wet (liquid) measuring cup is a glass/transparent cup, with markings on the side, and typically a spout to allow for easier pouring. A dry measuring cup is typically a cylindrical cup with a handle, and is designed to scoop ingredients like flour, sugar, etc., and then allow the backside of a knife or other utensil to level off the ingredient.  While 1 cup is 1 cup for liquids, regardless of which cup you use, there is an important difference. When measuring something like flour with a wet measuring cup, you have to shake it back and forth to get the top to settle flat. Doing this can actually pack the flour down, resulting in more ingredient than you should have. By using a dry measuring cup, you can scoop out what you need, and then scrape the top flush without packing the flour into the cup. Using too much flour can quickly turn a cake into more of a loaf of bread, so this is an important distinction!

Delectable Directions:

  1. In a medium mixing bowl, combine the butter, cream cheese, and sugar. This is a great activity for your little one, and the mixing action promotes motor skills while also being cool to look at.
  2. In a large mixing bowl, combine milk, pudding mix, and whipped cream topping and mix it up. Again, fun times!
  3. Combine the two mixtures together and let sit while you prepare the Oreo cookies.
  4. Place 10 Oreo cookies into your food processor and blend until smooth. This can be a very fun activity for your child if they don’t mind loud noises. My younger child is not a fan of loud noises so we crumbled our cookies manually by placing them in a large baggie and rolling a rolling pin over them.
  5. Pour alternate layers of the pudding mixture and cookie crumbs into separate glasses or into one large glass pie plate.
  6. Give your worms a new home on the top. My kids really enjoyed this part as we stuffed parts of the worms into the pudding to make it seem as if they were crawling around the top of the dessert.
  7. Place your creations in fridge until cool. This only takes a couple of hours which allowed us to have it for dessert that evening!
  8. When ready to serve, I also topped our muddy creation with fresh mint leaves from my new herb garden!

Sweet Skills for Parents and/or Kids

Learning one’s way around the kitchen is an incredibly important skill which I’m very quickly learning with my family. With the hectic lifestyles we all used to have, and the fact that take-out was easier and more available than ever, the unfortunate result was that we were simply spending less time in the kitchen. This new self-sustaining lifestyle has taught me a few things about kitchen preparedness, different measuring methods, and how to grow my own herbs (to be blogged next time)!

In addition to learning how to make your own meals, working in the kitchen promotes many other positive aspects of children’s development. By encouraging my older child, Grizzly Bear, to help me read and follow recipes, I’ve been helping him develop his math skills, vocabulary, and social skills, not to mention helping him learn his way around the kitchen too! By promoting this fun and rewarding experience, you too can provide your child with important life-long skills!

Appetizing Extras

Looking to make your own instant pudding mix? Check this out for use in this recipe and storage for later days. All that’s needed is to mix 1¼ cups of sugar, 1 cup of cornstarch, 1 cup of milk powder, ¼ cocoa powder, and a pinch of salt. Store in an airtight container for later use! When ready to make your pudding, boil 2 cups of milk with ½ cup of your mixture in a saucepan then simmer for about 5 minutes. Let it cool in a bowl for 10 minutes before serving. Also, if you don’t like that skin that forms at the top of the pudding, press clingwrap to the surface of the pudding before putting in the fridge to cool. Works like a charm!

Exquisite Farewell

Well, I’m sure it goes without saying, this was a fantastic birthday treat for everyone and the kids really enjoyed telling the story of its creation!

I hope this cake makes you eager to try something new too – or at least brings back memories of your favourite childhood treats! Please reach out if you have a favourite birthday cake recipe you want to share! All the best and stay safe!

Making a Birdhouse

Photo courtesy of Birds and Blooms.


The other day, I was visiting my parents when my Dad came in from the garage with a little pile of wood, nails, and a hammer under his arm. He had recently been building a new fence from cedar and had an extra board left over – perfect for making a birdhouse he said! My boys were so excited to help their Grandpa build the birdhouse and get a little taste for woodworking too. And Grandpa was also very impressed with their knowledge and familiarity with tools (I reminded him that their Dad was also an avid woodworker and that they had built me a few birdhouses over the years for Mother’s Day). Well, he said, this should be easy!

My Dad started showing them the pieces and tools. Not every birdhouse is built the same, and all are unique. However, these were the materials he used!

Materials

One 5’ (60”) cedar fence board. Although not necessary, cedar is naturally durable and can outlast the outdoor elements better than most other types of wood, even without protective finishing. It won’t hurt the birds that will hopefully find your project worthy to raise their young and won’t harm your child if he/she decides to take a bite like little Polar Bear!

Hammer

Ruler/measuring tape

1-1/2” Finishing Nails

One heavy picture hanger

Hand Saw. Home centres like Home Depot and Rona will do one cut/piece of wood for free, but if you explain the project, they’ll likely do all of them!

Means of drilling a 1” hole. Again, most home centres will drill a hole for you if you explain the project!

Baby oil for finishing. Baby oil is also another non-toxic finish that makes your project stand out a little, smell pretty, and give your young child a fun, rather non-messy task!

Here are the steps to building a birdhouse with your little one. A little bit of prep is required before inviting your young one to the table though. These first few strides (Steps 1 through 5) are best done on your own, or with a second adult there purely for supervision purposes as you won’t be able to watch both your child and your fingers at the same time! Again, if you don’t have a saw or drill, try taking your project to a home centre for a little bit of free help!

Photo courtesy of Birds and Blooms.


Saws and Cuts

Step 1:

If using a saw, cut two 10 inch lengths from your board. These will make up the front and roof of your birdhouse. The remaining length should be 40 inches.

Step 2:

Drill a hole in the centre of the front board. Usually a 1 inch hole works great for black-capped chickadees or birds of similar size. If the hole is too big, you may attract a different kind of bird or even a squirrel!

Step 3:

Cut one 7 ¾ inch length from your board. This piece is the back of the house. The remaining length should be 32 ¼ inches.

Step 4:

Cut one 4 inch length from your board. This will be the floor. The remaining length of board should be 28 ¼ inches.

Step 5:

Finally, cut one 18 inch length. The remaining piece of your board will be scrap – or the start of another project as my husband likes to think of it!

On the 18 inch board, make one mark at 10 inches on the left side. Transfer your measuring tape/ruler to the right side of the board and make a mark at 8 inches. Connect the two marks with a line (which will be a diagonal line). Make your cut on this line. This will make up the walls of the birdhouse.

Photo courtesy of Birds and Blooms.


Hammer and Nails

This was the part in which Grandpa invited the boys to help. They all sat on the floor with rapt attention and my Dad let them both have a go with the hammer as he held the nail in place (a very brave man indeed!). He always started and finished the nails off to help the project along and keep the boys from losing focus too. It was a pretty awesome and creative project for the group! Here’s how he did it:

Step 6:

Align one wall with the front of the birdhouse and nail them together with a nail at the top and bottom of each piece. Then everyone gets a turn as you repeat this process until you have all walls together. My older Grizzly Bear became a little bossy as he directed the crew and pieces!

Step 7:

Insert the floor of the birdhouse between the walls, and hammer into place. You can do the same for the roof too!

Step 8:


Nail the hanger into the centre of the back wall of your birdhouse.

Step 9:

This step is particularly fun for the littler ones. Use paper towel to dab baby oil over the project to give it a nice finish. It will turn the wood a slightly darker colour, so don’t be shocked if your project suddenly resembles a masterpiece!

Step 10:

Place a nail into your desired fence post and hang the birdhouse. Then spread seed on the ground in front of it. Be careful not to put birdseed directly into the birdhouse. I made this mistake a few years go. It only attracted visitors eager for a feast, not a couple eager to raise a family.

Lastly, keep an eye out for your little visitors! There’s nothing better than doing a little birdwatching with your own little chicks in the early months of spring!